EQQ Installer
Current release: EQQSetup v26.01 Build 141
The EQQ Installer sets up Ewarenow Quick Query on a Windows Server, including the web application, the database, optional MCP Gateway for AI integration, and all supporting configuration. It runs as a single .exe wizard or unattended from a JSON file.
System Requirements
| Layer | Requirement |
|---|---|
| OS | Windows Server 2016+ or Windows 10/11 with IIS |
| Rights | Local Administrator (installer self-elevates) |
| Web server | IIS 10+ with URL Rewrite module |
| .NET | .NET Framework (bundled with the web app) |
| Database | One of: SQL Server 2008+, MySQL 5.7+, PostgreSQL 10+ - with an admin account (sa, root, or postgres) reachable during install |
| AI add-on | ASP.NET Core Hosting Bundle - required only if you enable the MCP Gateway; installer links to the download if missing |
Installation Modes
| Mode | When to use | Effect on data |
|---|---|---|
| New Installation | First-time EQQ setup on this server | Creates fresh databases and the initial admin user |
| Upgrade | Moving an existing install to a newer build | Preserves all data, users, and settings; runs schema migrations |
| Uninstall | Removing EQQ | Removes web files and IIS bits; databases are kept by default - drop them manually if you want a clean slate |
The installer auto-detects an existing install and pre-selects Upgrade.
Interactive Install Walkthrough
The wizard has eight steps. You can go back and edit any earlier step before the final install.
1. Welcome
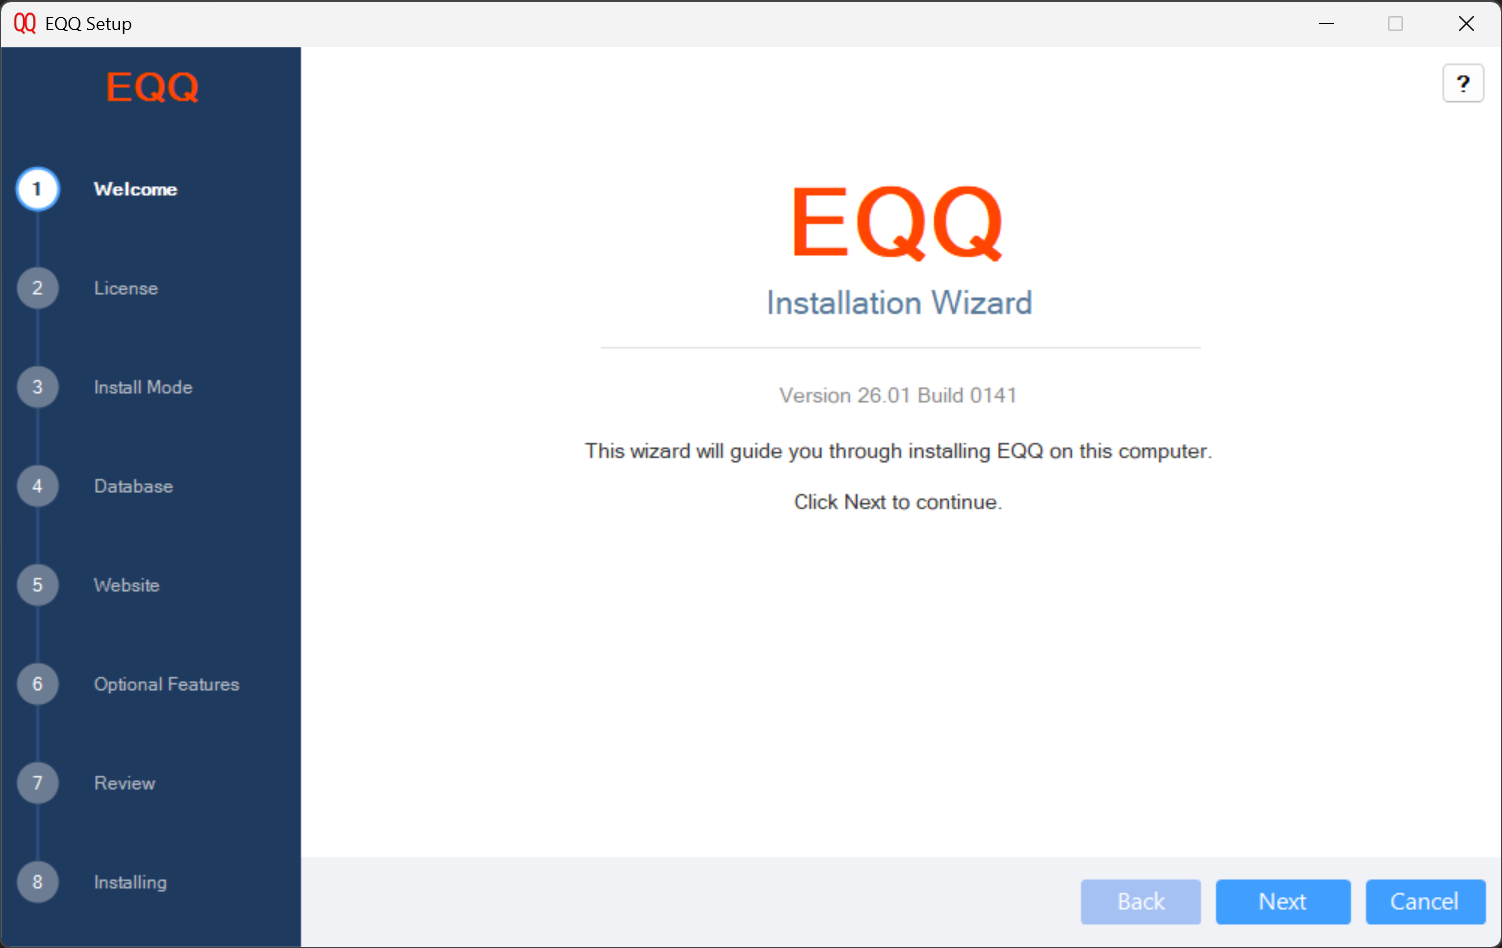
Shows product name and version. Click Next.
2. License
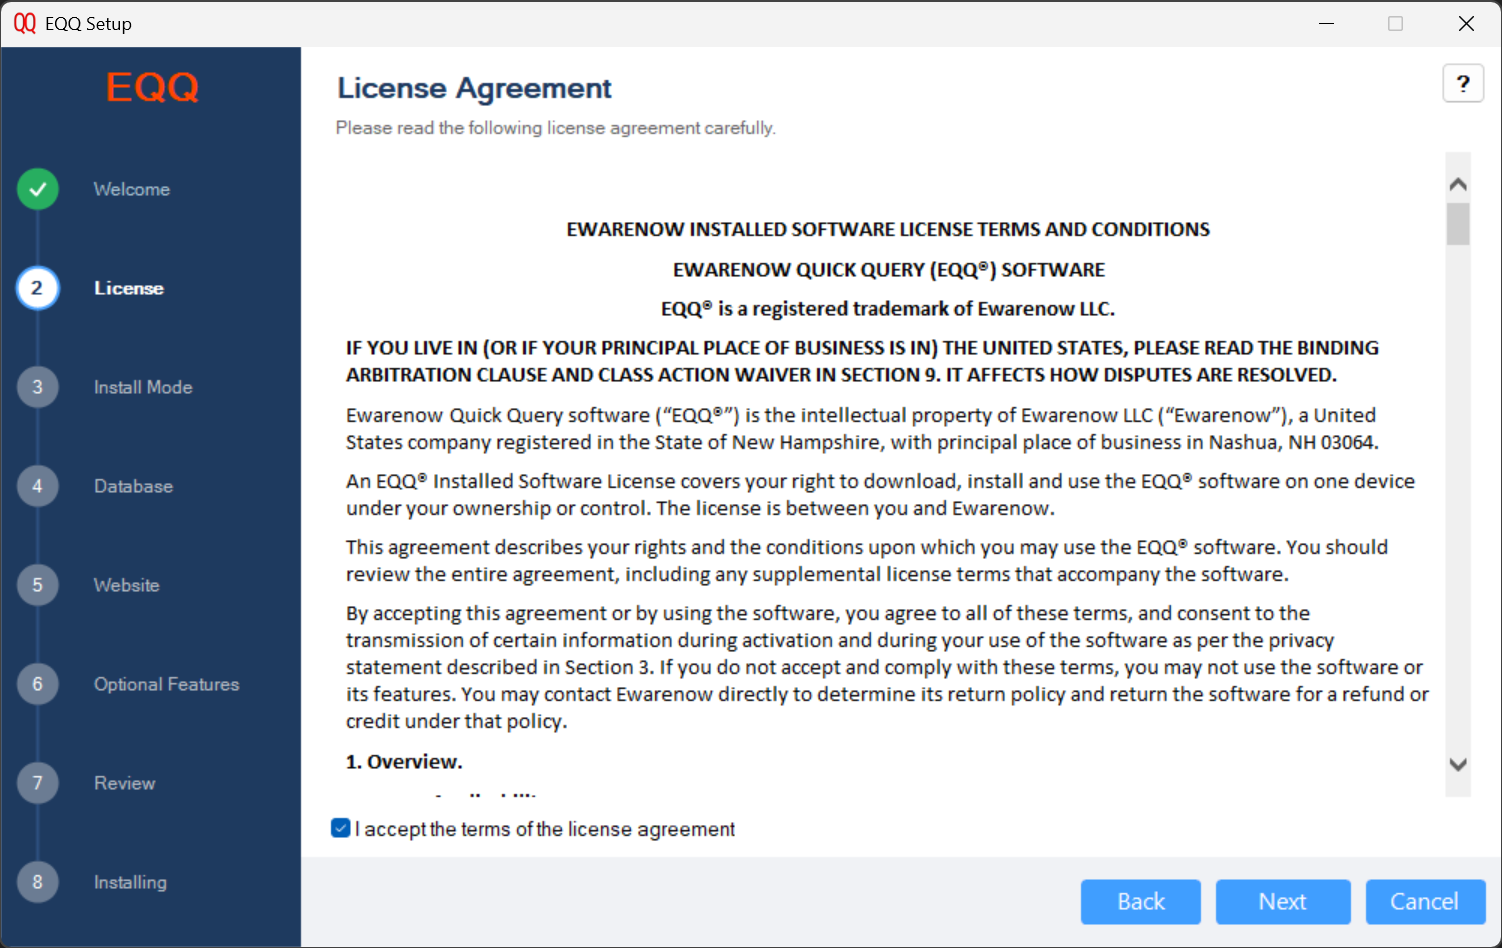
Read and accept the Ewarenow Installed Software License Terms to continue.
3. Install Mode
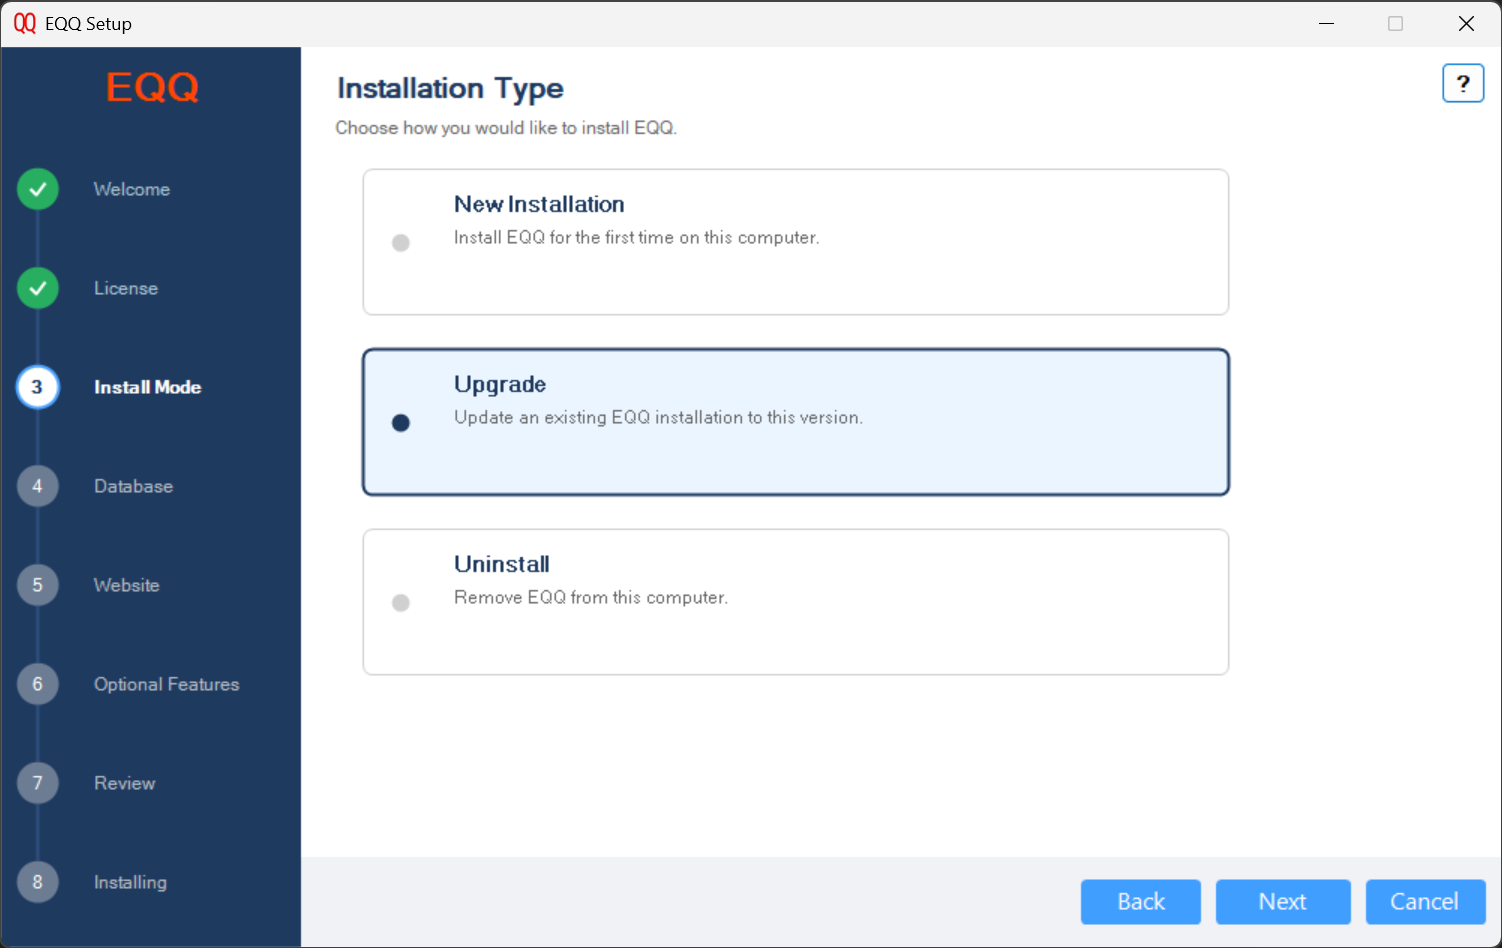
Pick one:
- New Installation - Install EQQ for the first time on this computer.
- Upgrade - Update an existing EQQ installation to this version. (Auto-selected if an existing install is detected.)
- Uninstall - Remove EQQ from this computer.
4. Database Configuration
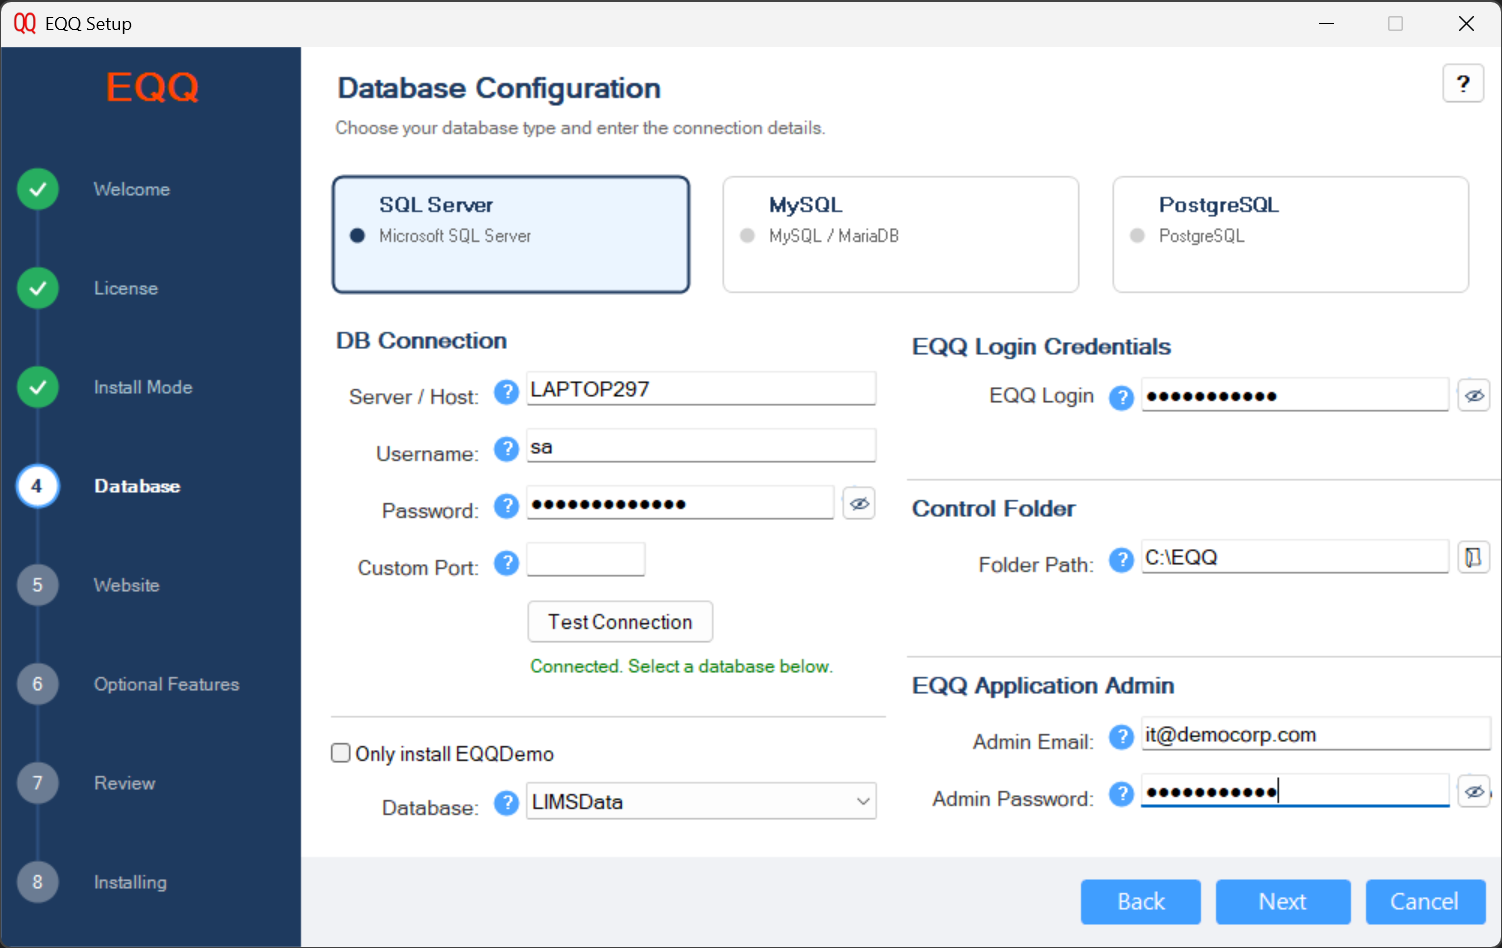
Pick your database platform and provide the admin credentials the installer will use to create databases and accounts.
Connection:
| Field | Example | Notes |
|---|---|---|
| Database type | SQL Server / MySQL / PostgreSQL | Controls the rest of the form. |
| Server | .\SQLEXPRESS, localhost, db01.corp |
Include instance name for SQL Server. |
| Port | 1433 / 3306 / 5432 | Defaults shown per platform. |
| Admin user | sa, root, postgres |
Must have CREATE DATABASE rights. |
| Admin password | - | Used only during install. Not stored. |
Click Test Connection to verify before proceeding.
Databases:
| Field | Default | Notes |
|---|---|---|
| Client Database | EQQuery |
Main EQQ catalog DB - select from the dropdown after a successful connection. |
| Only install EQQDemo | ☐ unchecked | Tick to install only the demo database without a client database. |
Application credentials:
| Field | Purpose |
|---|---|
| EQQ Login | Password for the dedicated SQL login the web app uses. |
| Control Folder | Where EQQ stores certificates and control data. Default C:\EQQ. |
| Admin Email | (New installations only) - first EQQ admin user. |
| Admin Password | (New installations only) - first EQQ admin password. |
5. Website Configuration
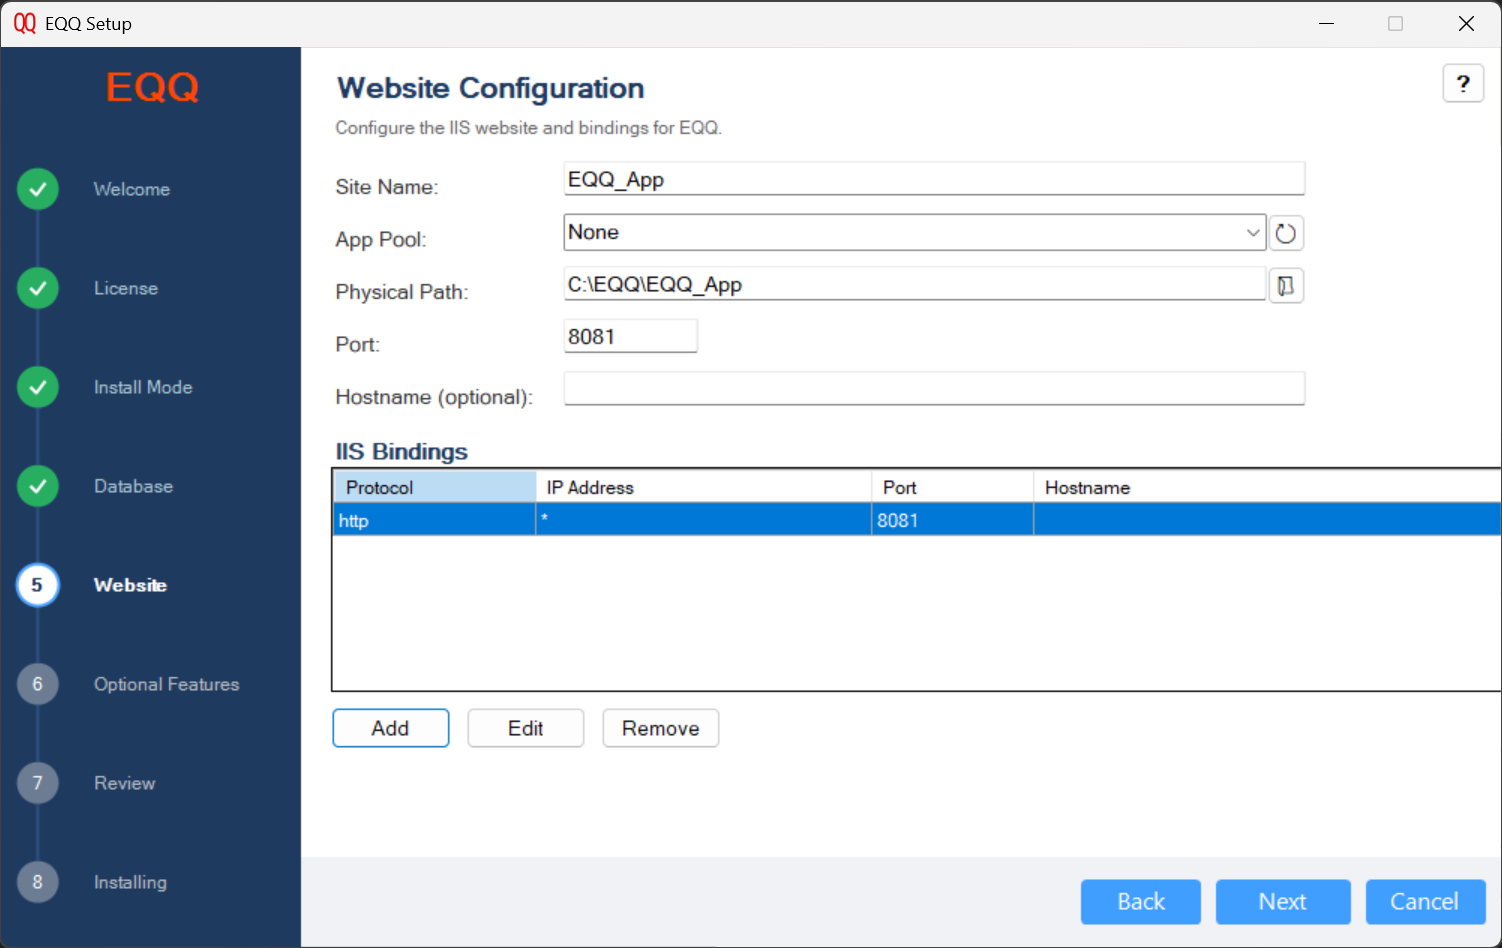
Configure IIS hosting for the web application.
| Field | Default | Notes |
|---|---|---|
| Site Name | EQQ_App |
Must be unique in IIS. |
| Application Pool | None (auto-create) |
Or pick an existing pool from the dropdown. |
| Physical Path | C:\EQQ\EQQ_App |
Deployment folder. |
| Port | 8081 |
Per binding. |
| Hostname | (blank) | Optional DNS name (e.g. eqq.example.com). |
Use Add / Edit / Remove on the IIS Bindings list to configure additional IP/port/hostname combinations (e.g. HTTP redirect + HTTPS on 443).
6. Optional Features
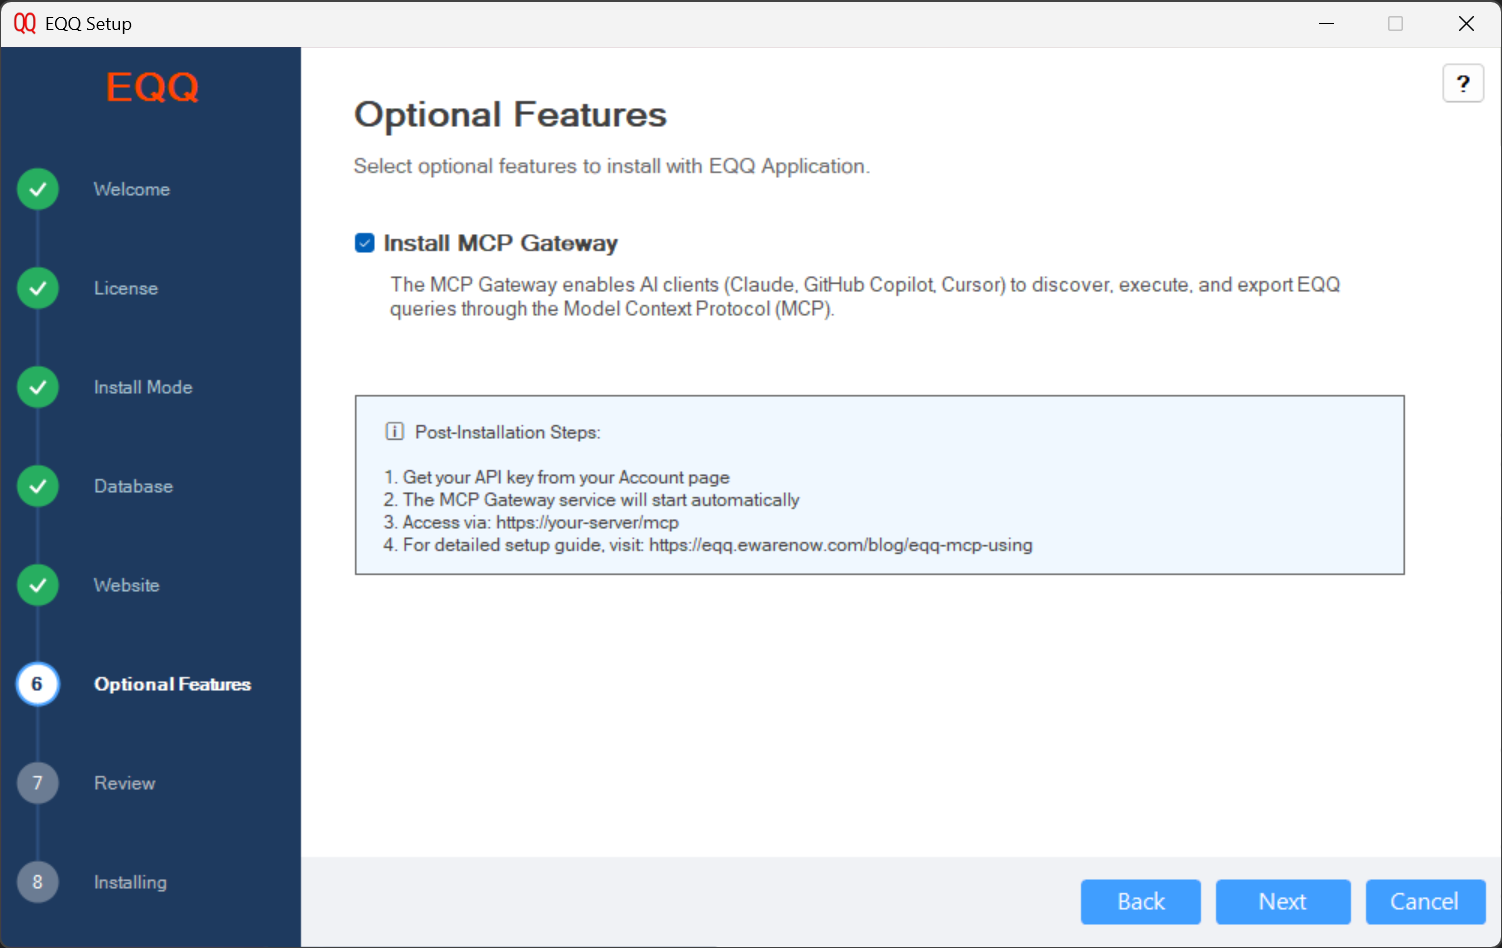
- Install MCP Gateway - when ticked, installs the MCP Gateway as a sub-application under
/mcpof the EQQ site, letting AI tools (Claude, GitHub Copilot, Cursor) query EQQ data via the Model Context Protocol. See the MCP Gateway page for post-install setup.
After enabling MCP Gateway
Generate an API key under My Account → API Keys and use it to connect your AI client. The gateway starts automatically - no additional service management needed.
7. Review
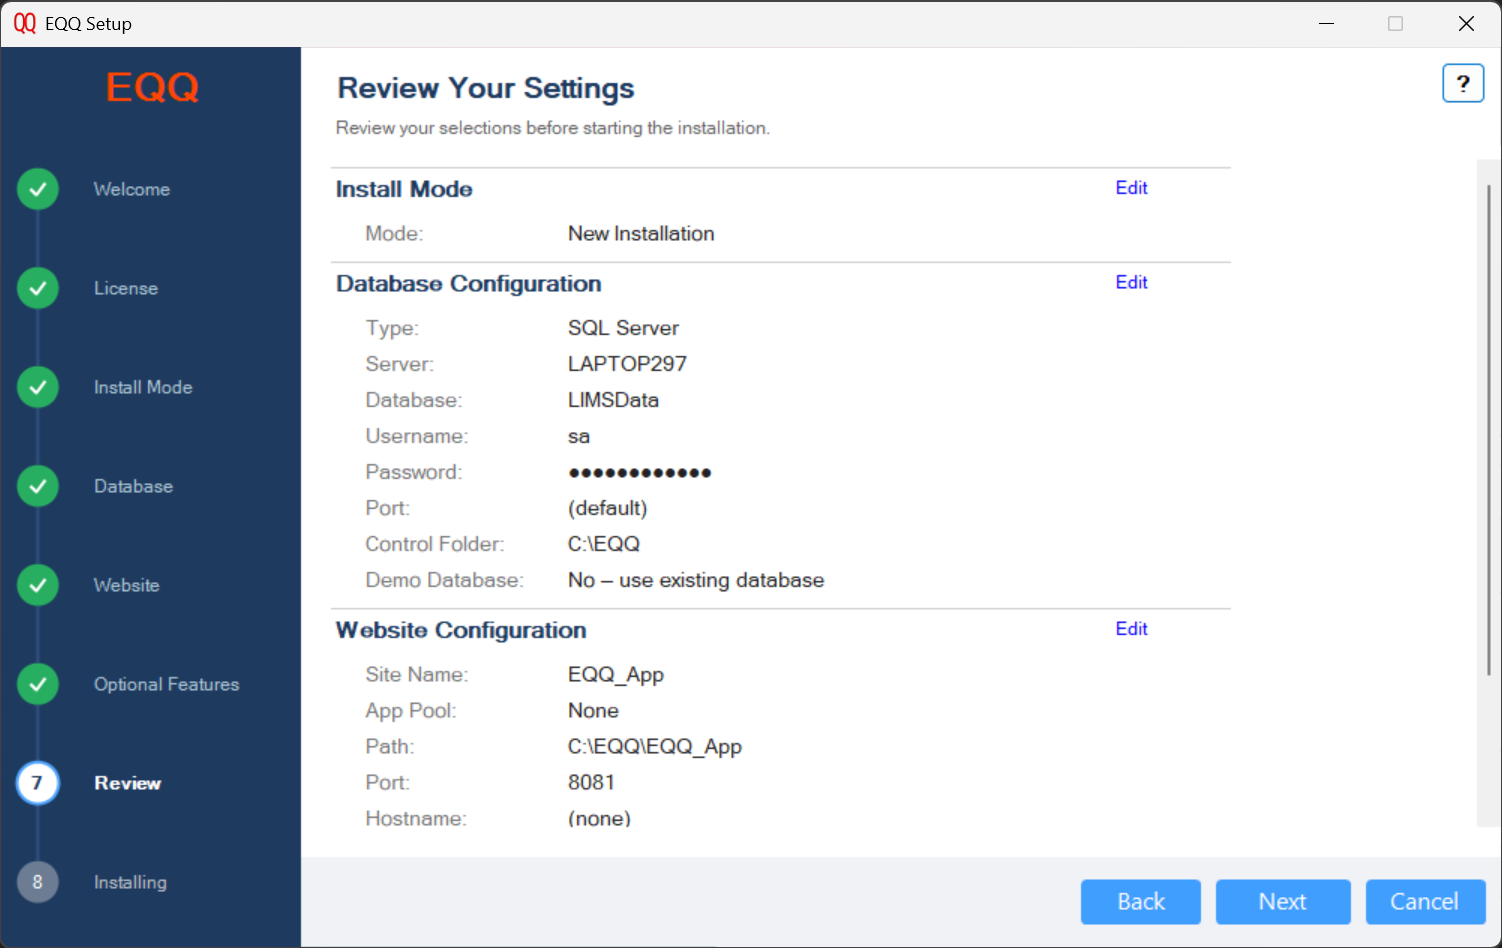
Read-only summary of every selection you made. Click Edit next to any section to jump back and adjust it. When satisfied, click Next to begin the install.
8. Installing
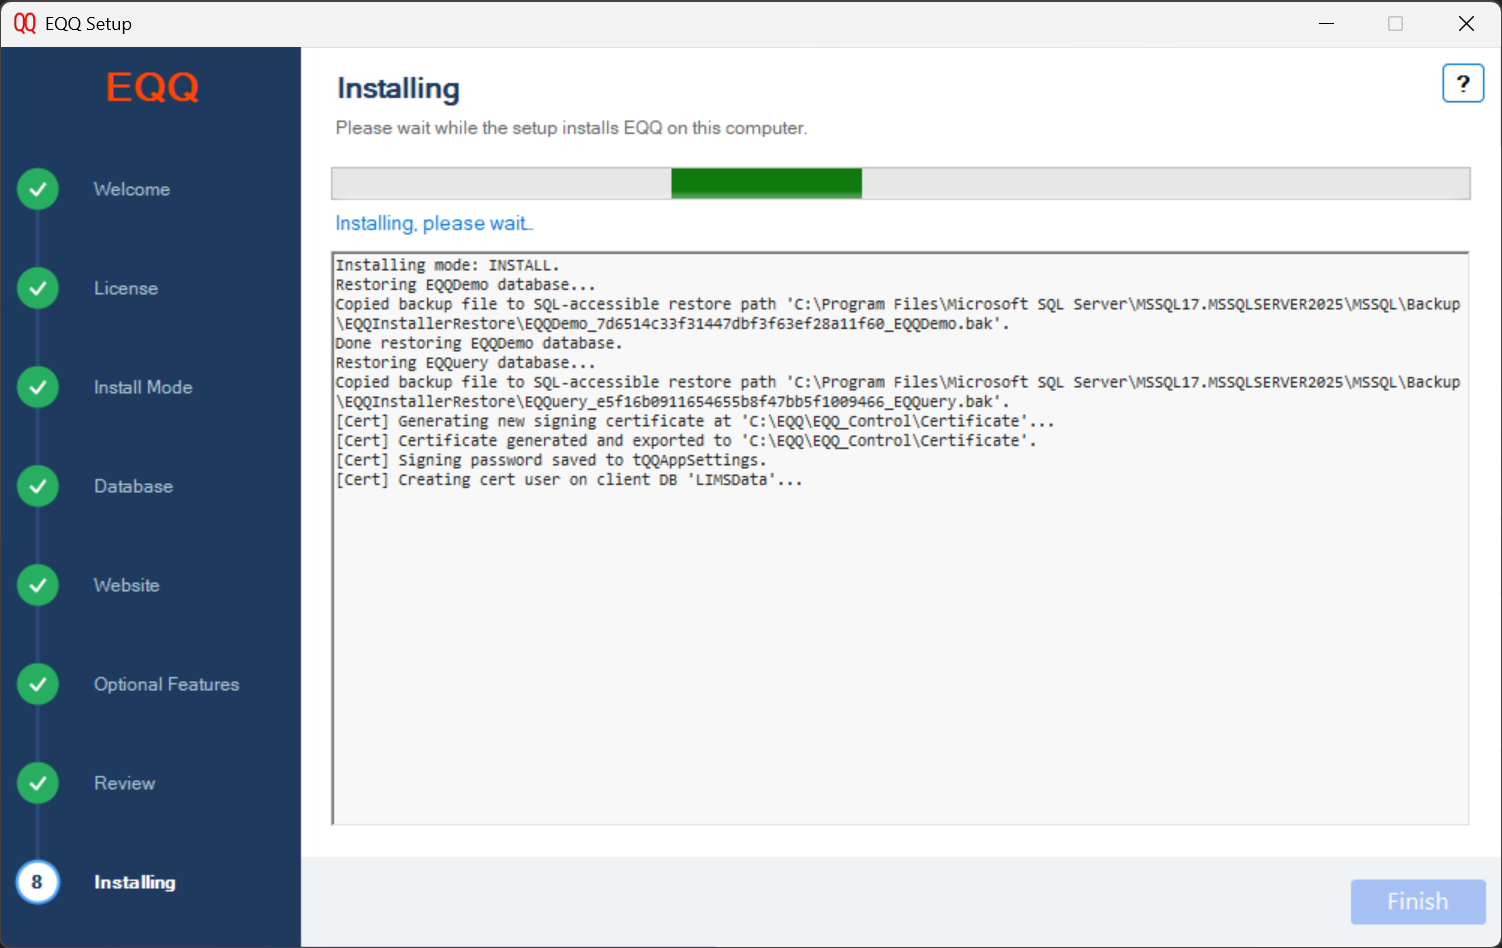
Progress bar plus a real-time log showing each action the installer takes (database restore, certificate generation, IIS configuration, etc.).
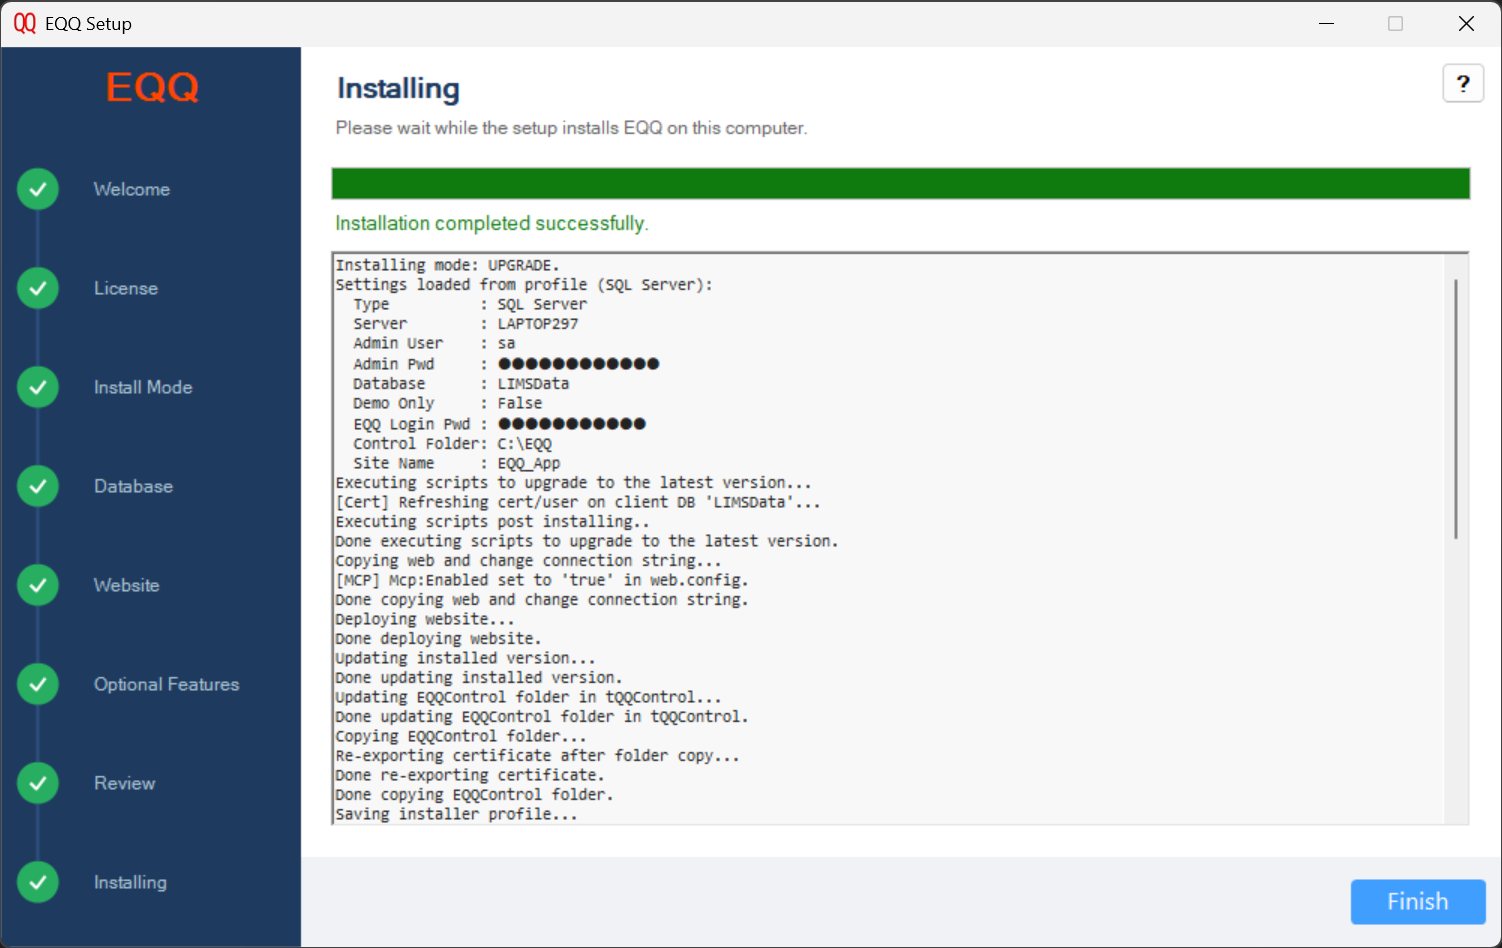
When finished the installer:
- Writes a timestamped log to
C:\EQQ\EQQ_InstallerLog\ - Enables the Finish button - click it to close the wizard
Sign in with the admin email and password you entered in Step 4.
What Gets Installed
Folder layout
C:\EQQ\
├── EQQ_App\ ← IIS web application files
├── EQQ_Control\ ← Certificates, saved SQL, control data
├── EQQ_InstallerLog\ ← Installer logs (timestamped)
├── MCPGateway\ ← MCP Gateway (only if enabled)
│ ├── MCPGateway.exe
│ ├── appsettings.json
│ ├── web.config
│ └── logs\
└── Backup\ ← Optional database backups
Paths are configurable during install - the table above shows the defaults.
IIS
| Artifact | Default name | Path |
|---|---|---|
| Web site | EQQ_App |
C:\EQQ\EQQ_App |
| App pool | Auto-created, matches site name | (No Managed Code is fine for MCP sub-app; .NET for the main app) |
| Sub-app | /mcp (only when MCP is enabled) |
C:\EQQ\MCPGateway |
Databases
| Database | Purpose | Created on |
|---|---|---|
EQQuery |
Main EQQ catalog (users, queries, views, settings) | New installs |
EQQDemo |
Sample data for demos and first-run tutorials | New installs (optional) |
| Your client DB | Your actual reporting/analytical data | Optional - register under Settings → Database later |
Database login
A dedicated application login is created (EQQLogin) with the password you supply in Step 4. The web application uses this login; the admin credentials (sa, root, postgres) are used only during install and are not stored.
Unattended (Silent) Installation
For imaging, repeat deployments, or CI pipelines.
Command line
Exit codes:
| Code | Meaning |
|---|---|
0 |
Success |
1 |
Failure - see the log in C:\EQQ\EQQ_InstallerLog\ |
Config file
Sample config.json for a new SQL Server install with MCP enabled:
{
 "Mode": "install",
 "DbType": "mssql",
 "SqlServer": ".\\SQLEXPRESS",
 "SqlAdminUser": "sa",
 "SqlAdminPassword": "YourAdminPwd",
 "EqqLoginPassword": "EqqAppPwd",
 "EqqAdminEmail": "admin@example.com",
 "EqqAdminPassword": "FirstAdminPwd",
 "EqqControlFolder": "C:\\EQQ",
 "IncludeDemoDb": true,
 "UseStandardBackup": true,

 "SiteName": "EQQ_App",
 "AppPoolName": "None",
 "WebRootFolder": "C:\\EQQ\\EQQ_App",
 "Bindings": [
 { "BindingType": "http", "IpAddress": "*", "Port": 8081, "HostName": "" }
 ],

 "InstallMcpGateway": true,
 "McpGatewayPort": 5000
}
Common options
| Option | Values | Default | Notes |
|---|---|---|---|
Mode |
install / upgrade / uninstall |
install |
|
DbType |
mssql / mysql / postgresql |
mssql |
|
SqlServer / MySqlServer / PostgreServer |
hostname | platform default | |
...Port |
int | 1433 / 3306 / 5432 | |
...AdminUser |
string | sa / root / postgres |
Install-time only. |
...AdminPassword |
string | - | Install-time only. |
EqqLoginPassword |
string | admin password | Persistent app login. |
EqqAdminEmail / EqqAdminPassword |
string | - | Required for new installs only. |
EqqControlFolder |
path | C:\EQQ |
Root for control data. |
IncludeDemoDb |
bool | true |
Install the demo DB. |
UseStandardBackup |
bool | true |
Restore from bundled backup. |
SiteName |
string | EQQ_App |
IIS site name. |
AppPoolName |
string | None |
None = auto-create. |
WebRootFolder |
path | C:\EQQ\EQQ_App |
Physical path. |
Bindings |
array | HTTP 8081 on all IPs | See sample above. |
InstallMcpGateway |
bool | false |
Include the AI gateway. |
McpGatewayPort |
int | 5000 |
Gateway port. |
RotateMssqlCertPasswordOnUpgrade |
bool | false |
SQL Server upgrade only. |
SkipIisDeployment |
bool | false |
DB-only validation. |
Upgrade Behavior
When you run a newer installer over an existing install and pick Upgrade:
- Version check - reads the currently installed build.
- Schema migrations - runs only the upgrade scripts newer than your current build, in order.
- Web files replaced - the
EQQ_Appfolder is updated with the new build. - Preserved - all users, roles, queries, views, functions, API keys, MFA enrollments, client databases.
- Rotate certificate (optional) - if you ticked the checkbox, the SQL signing certificate gets a new per-install password.
- Version recorded - the new build number is written back to the EQQ configuration store.
Back up first
The installer does not auto-backup databases. Take a SQL backup or snapshot before clicking Install.
Uninstall Behavior
Running Uninstall removes:
- Web application files in
C:\EQQ\EQQ_App\ - MCP Gateway in
C:\EQQ\MCPGateway\(if present) - The IIS site and auto-created app pool
- The dedicated
EQQLoginaccount on the database - The installer's registry profile
The installer does NOT remove:
- Your databases (
EQQuery,EQQDemo, your client DB) C:\EQQ\EQQ_Control\(certificates, custom SQL)C:\EQQ\Backup\- IIS configuration that pre-existed the install
Drop databases and delete C:\EQQ\ manually if you want a full cleanup.
Post-Install Checks
Once the installer finishes, verify:
- Sign in - open
http://<server>:<port>/and sign in withEQQAdminand the password you set in the installer. - Change your password if you want to update it after first sign-in.
- Enable MFA on the admin account - see Account & Security.
- Settings → License Manager - activate your license.
- Settings → Database - register any client databases you plan to query.
- MCP Gateway (if installed) - create an API key (My Account → API Keys) and test from Claude Desktop - see the MCP Gateway page.
Troubleshooting
| Symptom | Resolution |
|---|---|
| Installer won't launch | Right-click → Run as administrator. UAC elevation is required. |
| "SQL Server connection failed" in Step 4 | Check instance name, firewall, TCP/IP enabled in SQL Server Configuration Manager. |
| "Port 8081 already in use" | Change the site port in Step 5, or stop the conflicting service. |
| MCP Gateway option greyed out / fails | Install the ASP.NET Core Hosting Bundle from the Microsoft download link shown, then run iisreset and restart the installer. |
| Upgrade finishes but site won't load | Recycle the app pool, then hard-reload the browser. Check App_Data/Logs/error.log. |
| Headless install returns exit 1 | Look in C:\EQQ\EQQ_InstallerLog\ - the most recent file has the failing step. |
| Admin credentials forgotten after install | Have a Security Administrator reset the EQQAdmin account, or restore from a known-good backup. |
Log location
All installer runs write a timestamped log to:
Send this file with any support request - it contains every step the installer took.