Build Your First Query
This walkthrough takes you from a database connection to a working, parameterized query. Follow the four steps in order.
What you'll build:
Before you begin, confirm:
- You can sign in with a role that includes Settings Administrator, View Creator, and Query Creator (ask your Security Administrator if unsure - see Account & Security to check your own roles).
- The target database is reachable from the EQQ server, and you have an admin account for it (
safor SQL Server,rootfor MySQL,postgresfor PostgreSQL).
Step 1 - Connect your database
Navigate: Settings → Database → + New Database.
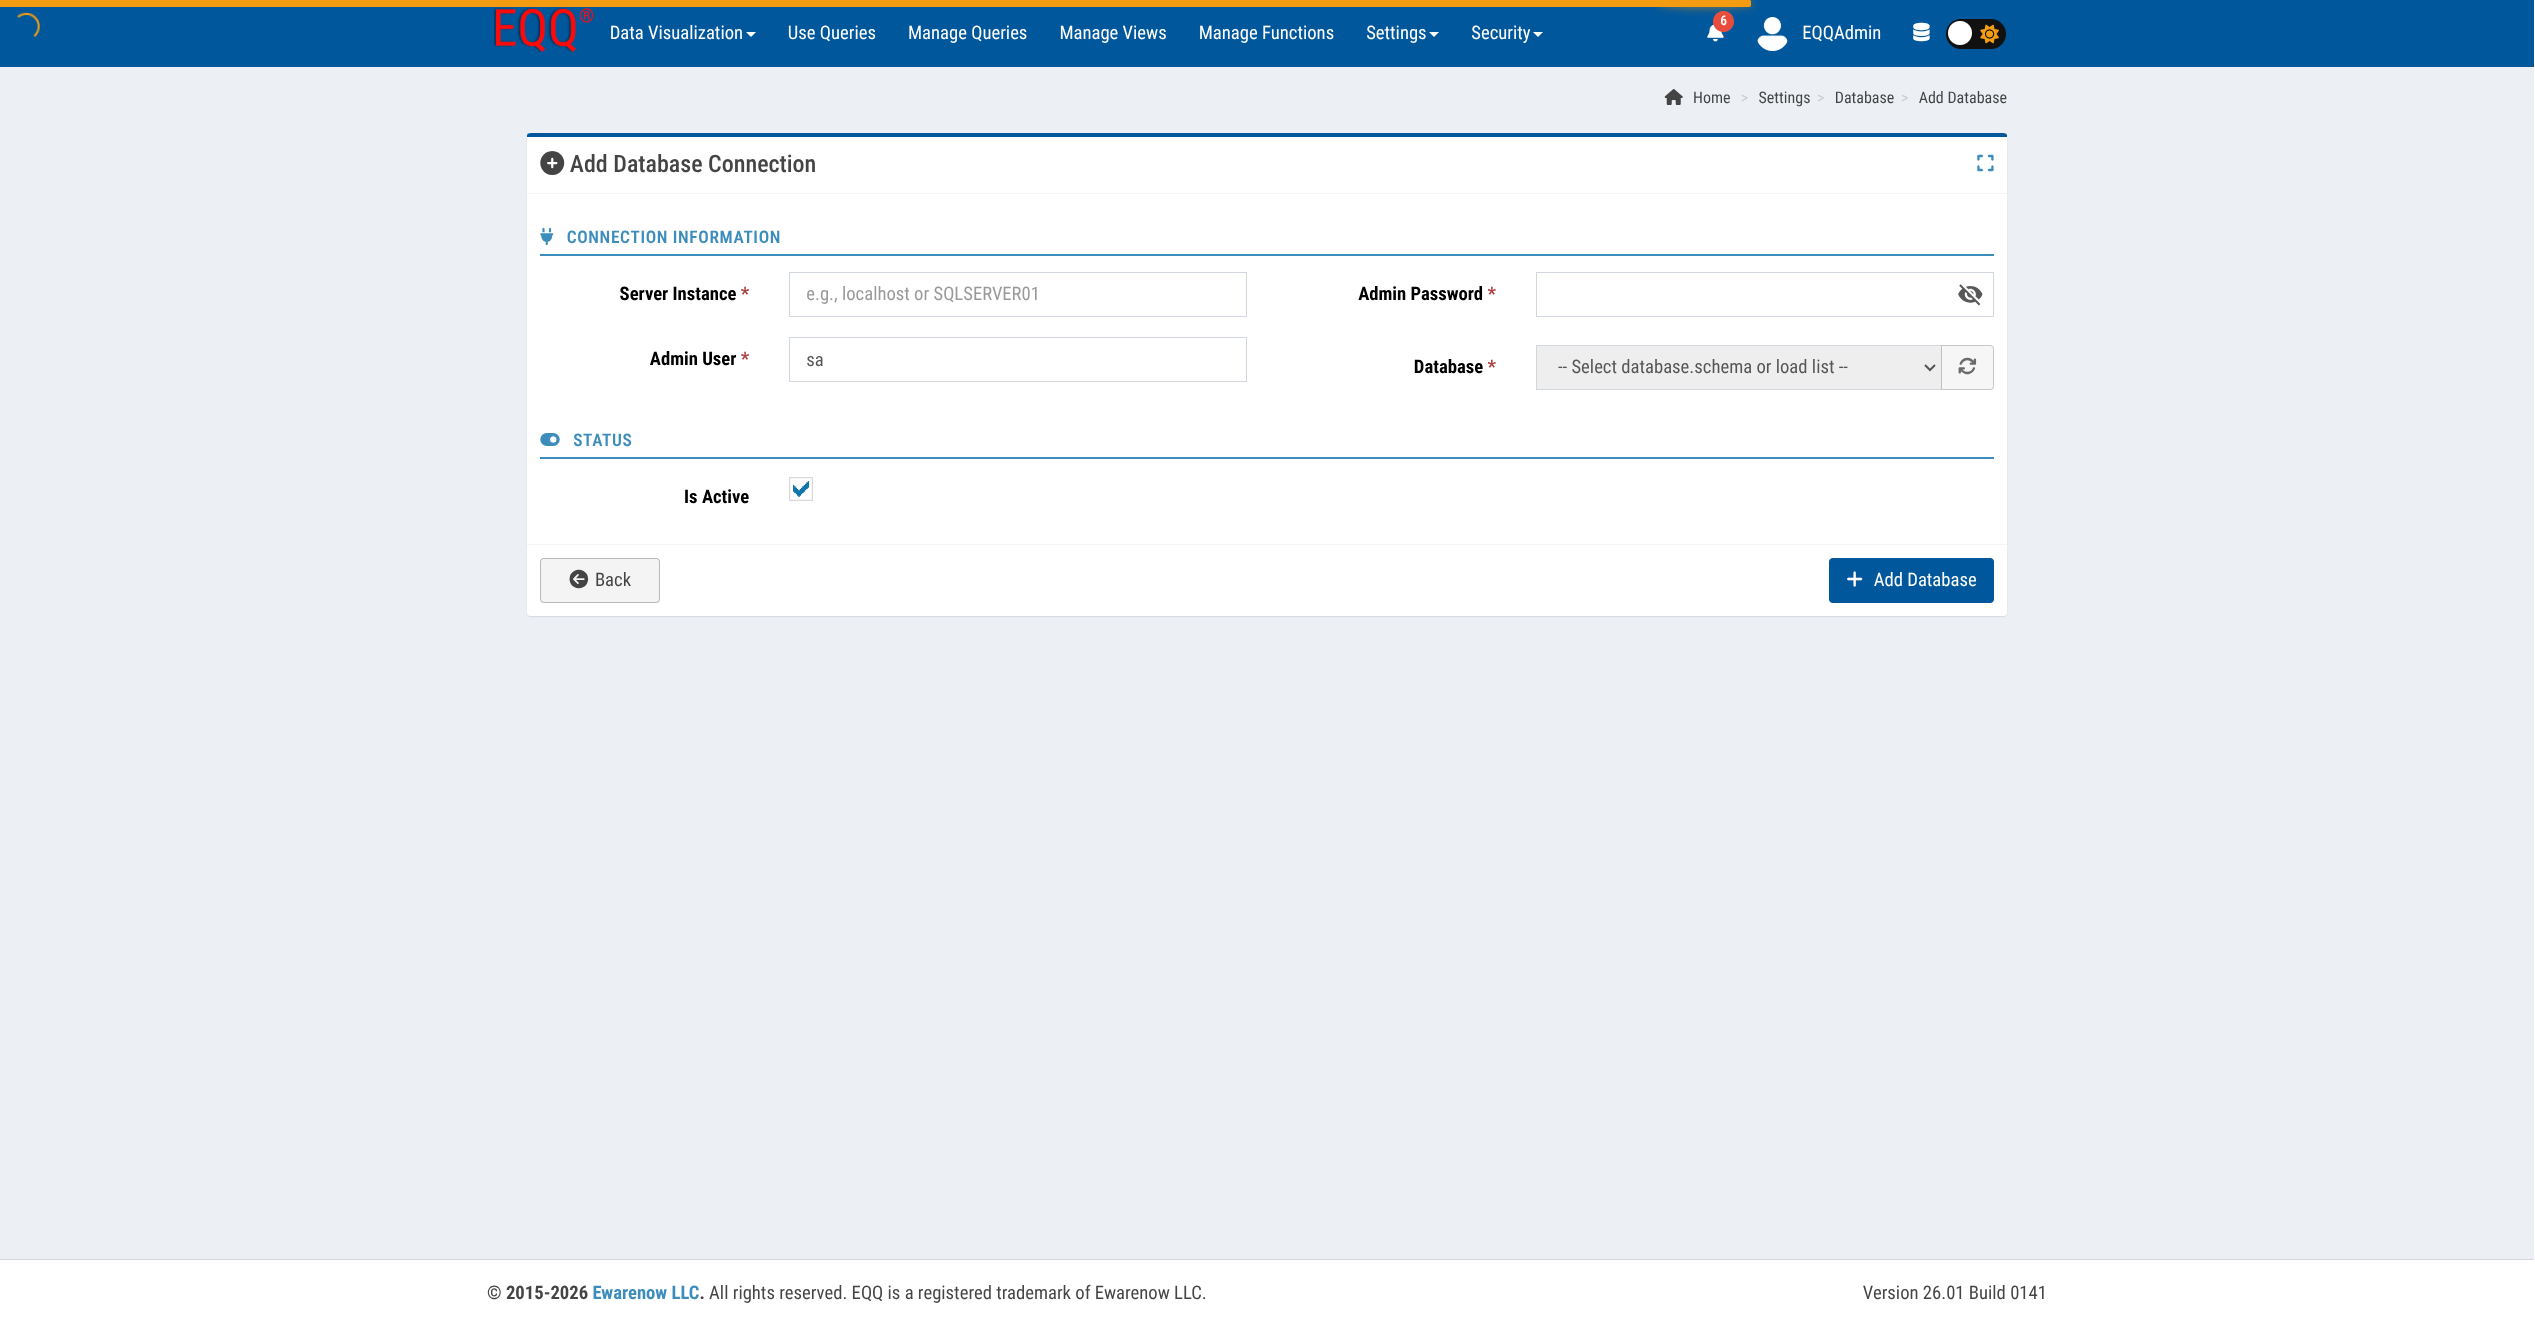
Fill in:
| Field | What to enter |
|---|---|
| Server Instance | Hostname or instance name - e.g. .\SQLEXPRESS or db01.corp |
| Admin User | An account with rights to read the schema - e.g. sa |
| Admin Password | That account's password. Used to load the database list below; not stored beyond this step. |
| Database | Click the reload icon next to this dropdown once Server Instance and credentials are filled in, then pick your target database from the list it loads. |
| Is Active | Leave checked |
Click + Add Database.
No separate 'test connection' step
Loading the Database dropdown is your connectivity check - if the reload icon successfully lists your databases, the connection works. There's no separate "Test Connection" button.
Database already connected?
Skip to Step 2.
Step 2 - Create a View
Navigate: Manage Views → + Create.
A View is EQQ's governed window into your data. Views are built in a 5-step wizard - the same wizard style as the Query editor you'll use in Step 3.
2a - Basic Information
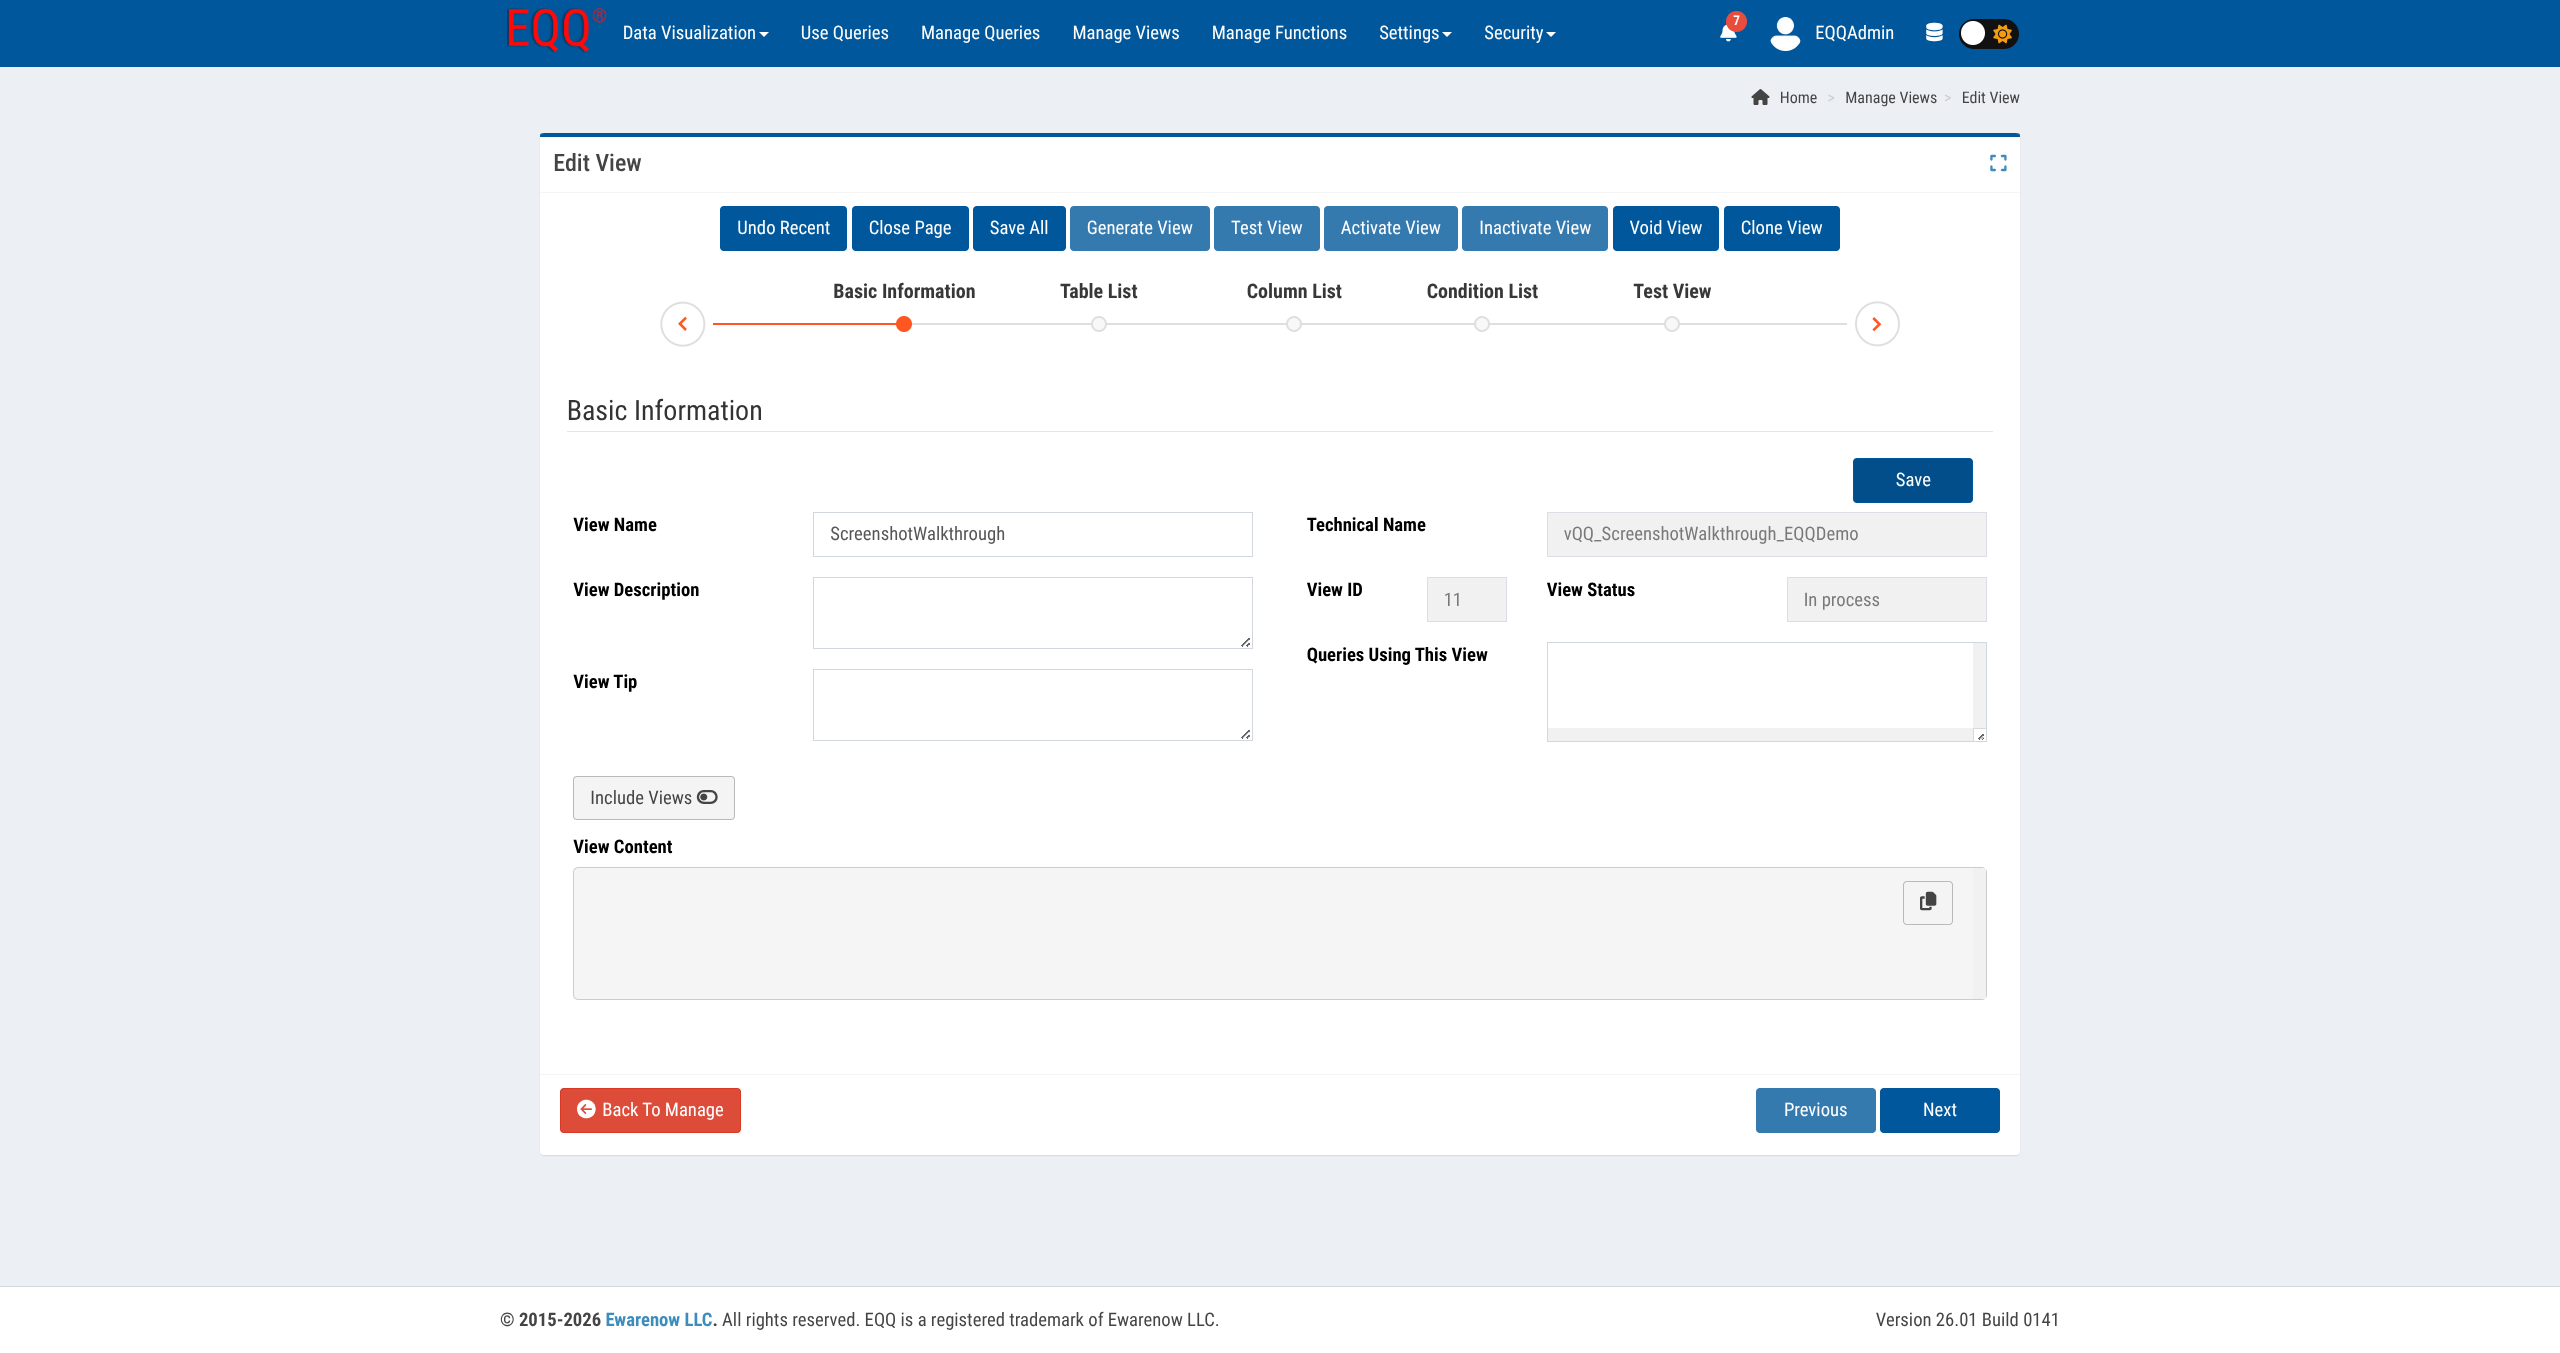
Enter a View Name (e.g. Customers), then click Save in this step's own toolbar (not the wizard's top bar - each step saves independently). This unlocks the remaining steps.
2b - Table List
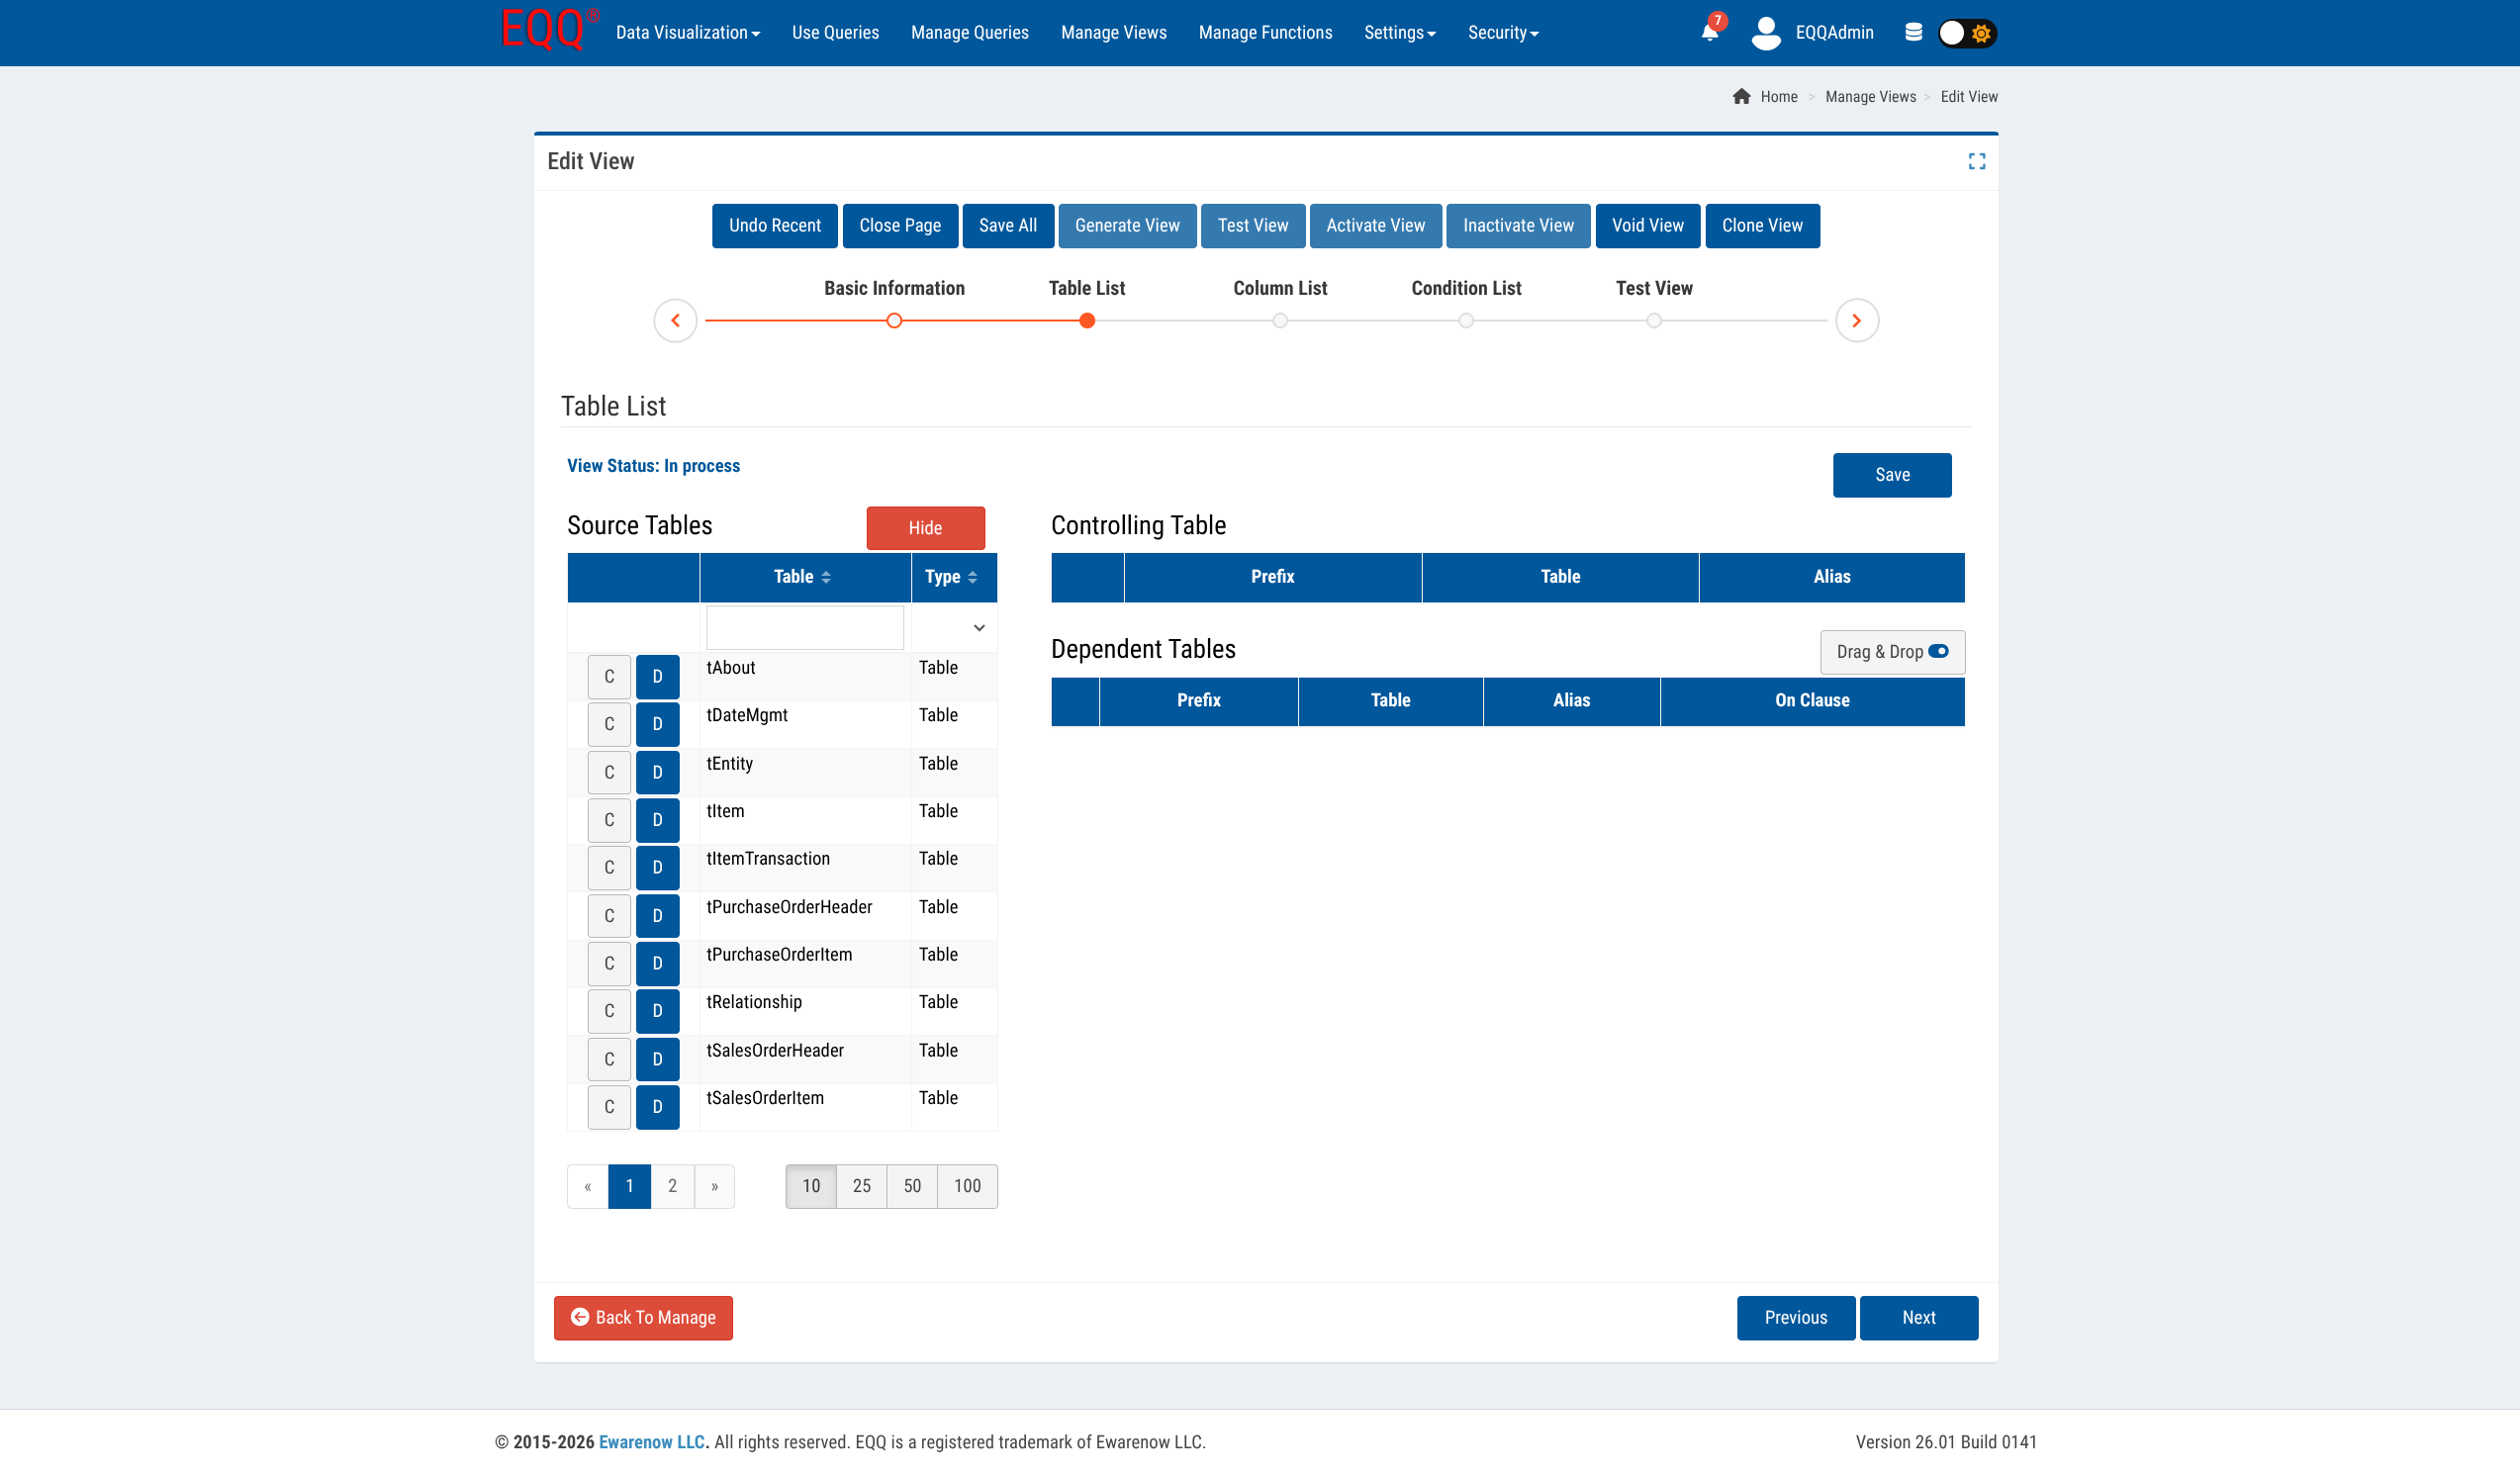
Click the C (Controlling Table) icon next to your main table in the Source Tables list. For your first View, one Controlling Table with no joins is enough.
2c - Column List
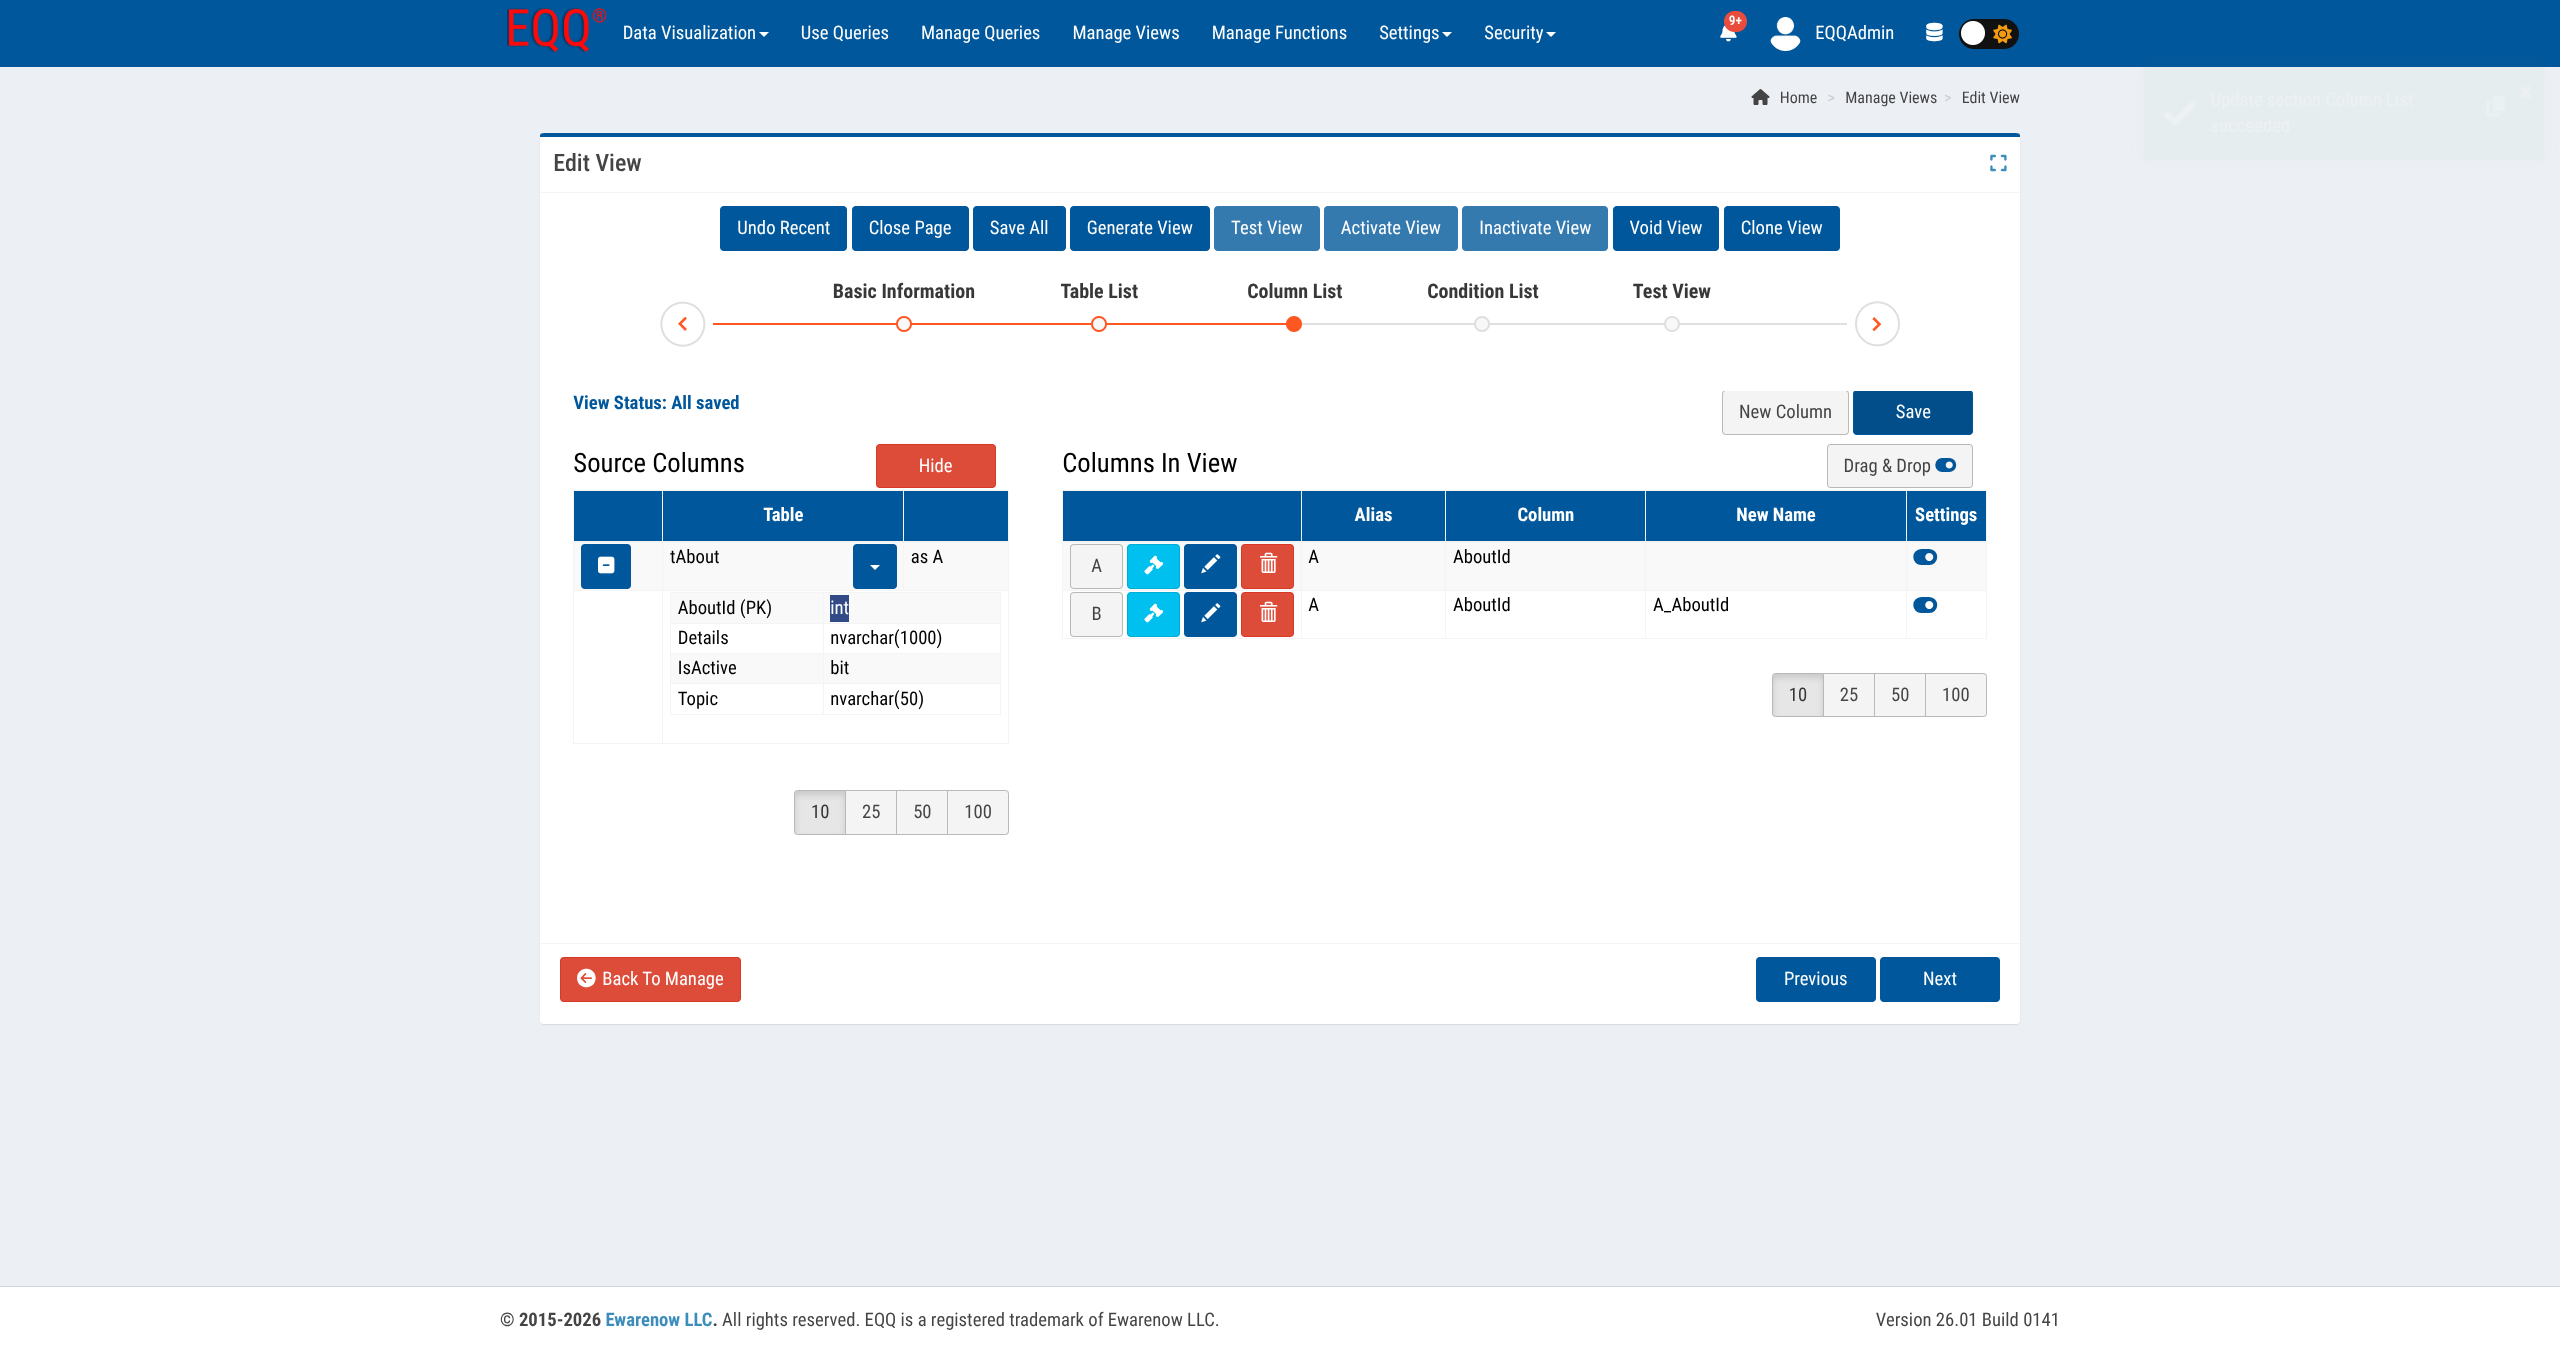
Drag columns from Source Columns into Columns in View. Leave Has Pivot and Has Grouping off for now - they're advanced features covered in the Views and Queries reference.
2d - Condition List (optional)
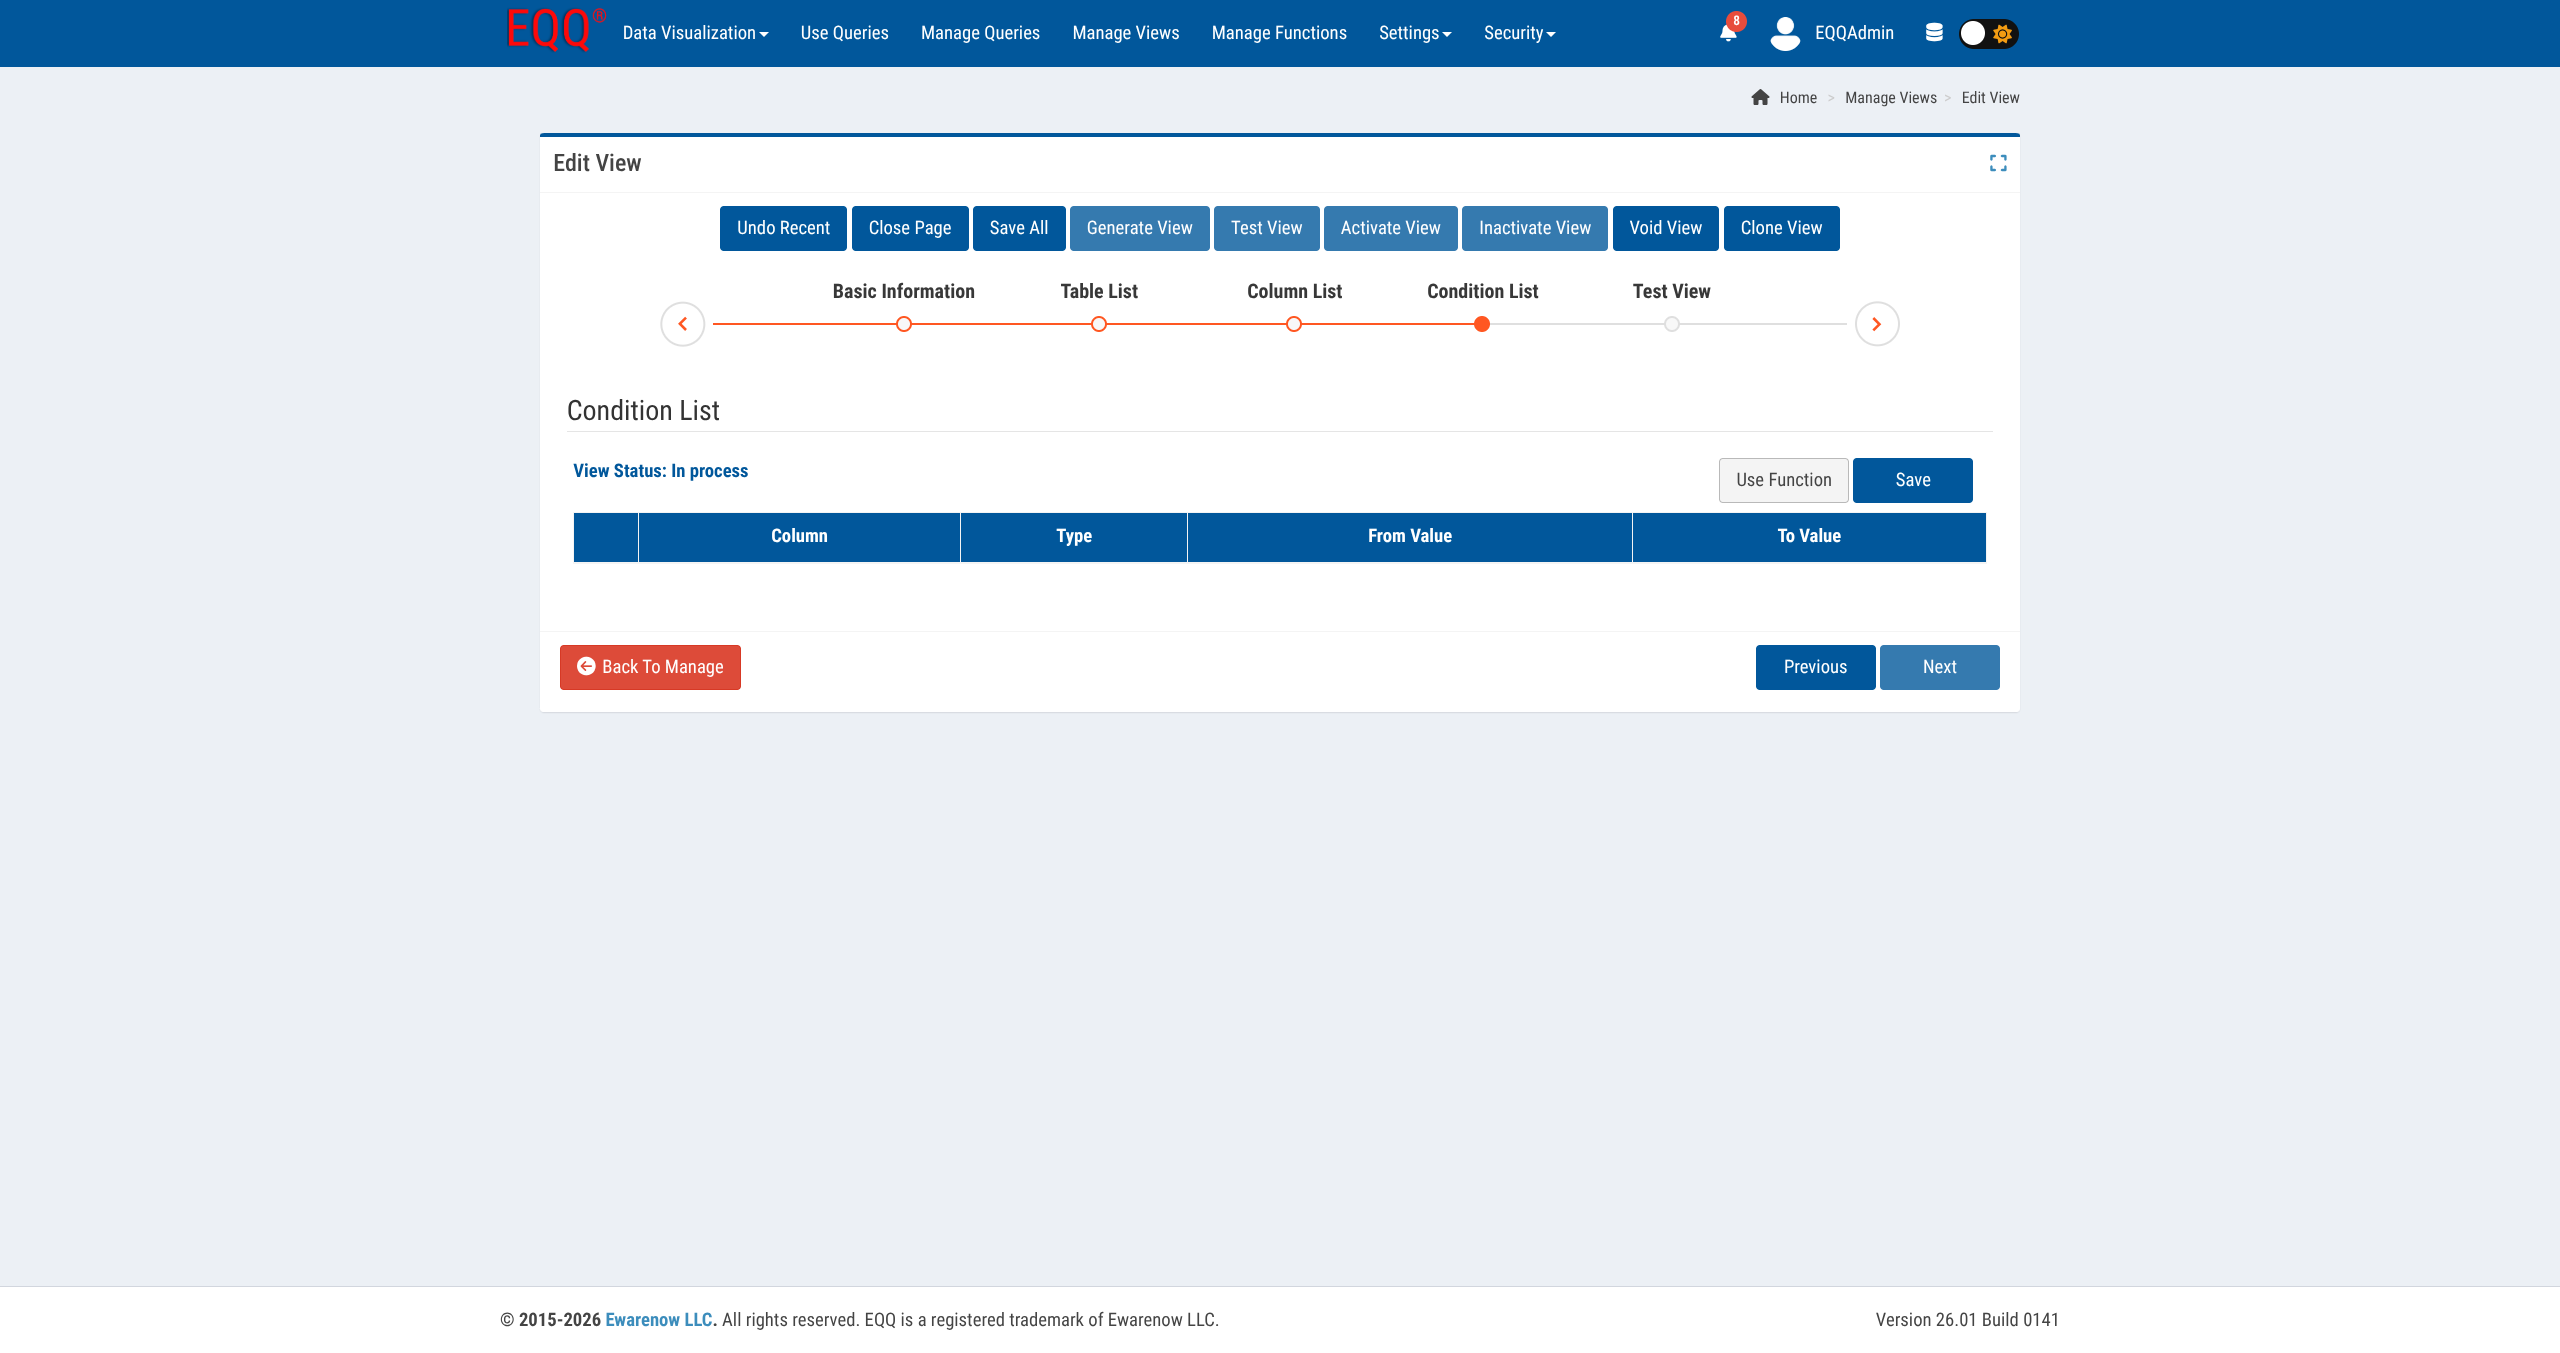
Skip this for your first View - it's for a fixed, always-applied filter.
2e - Test View
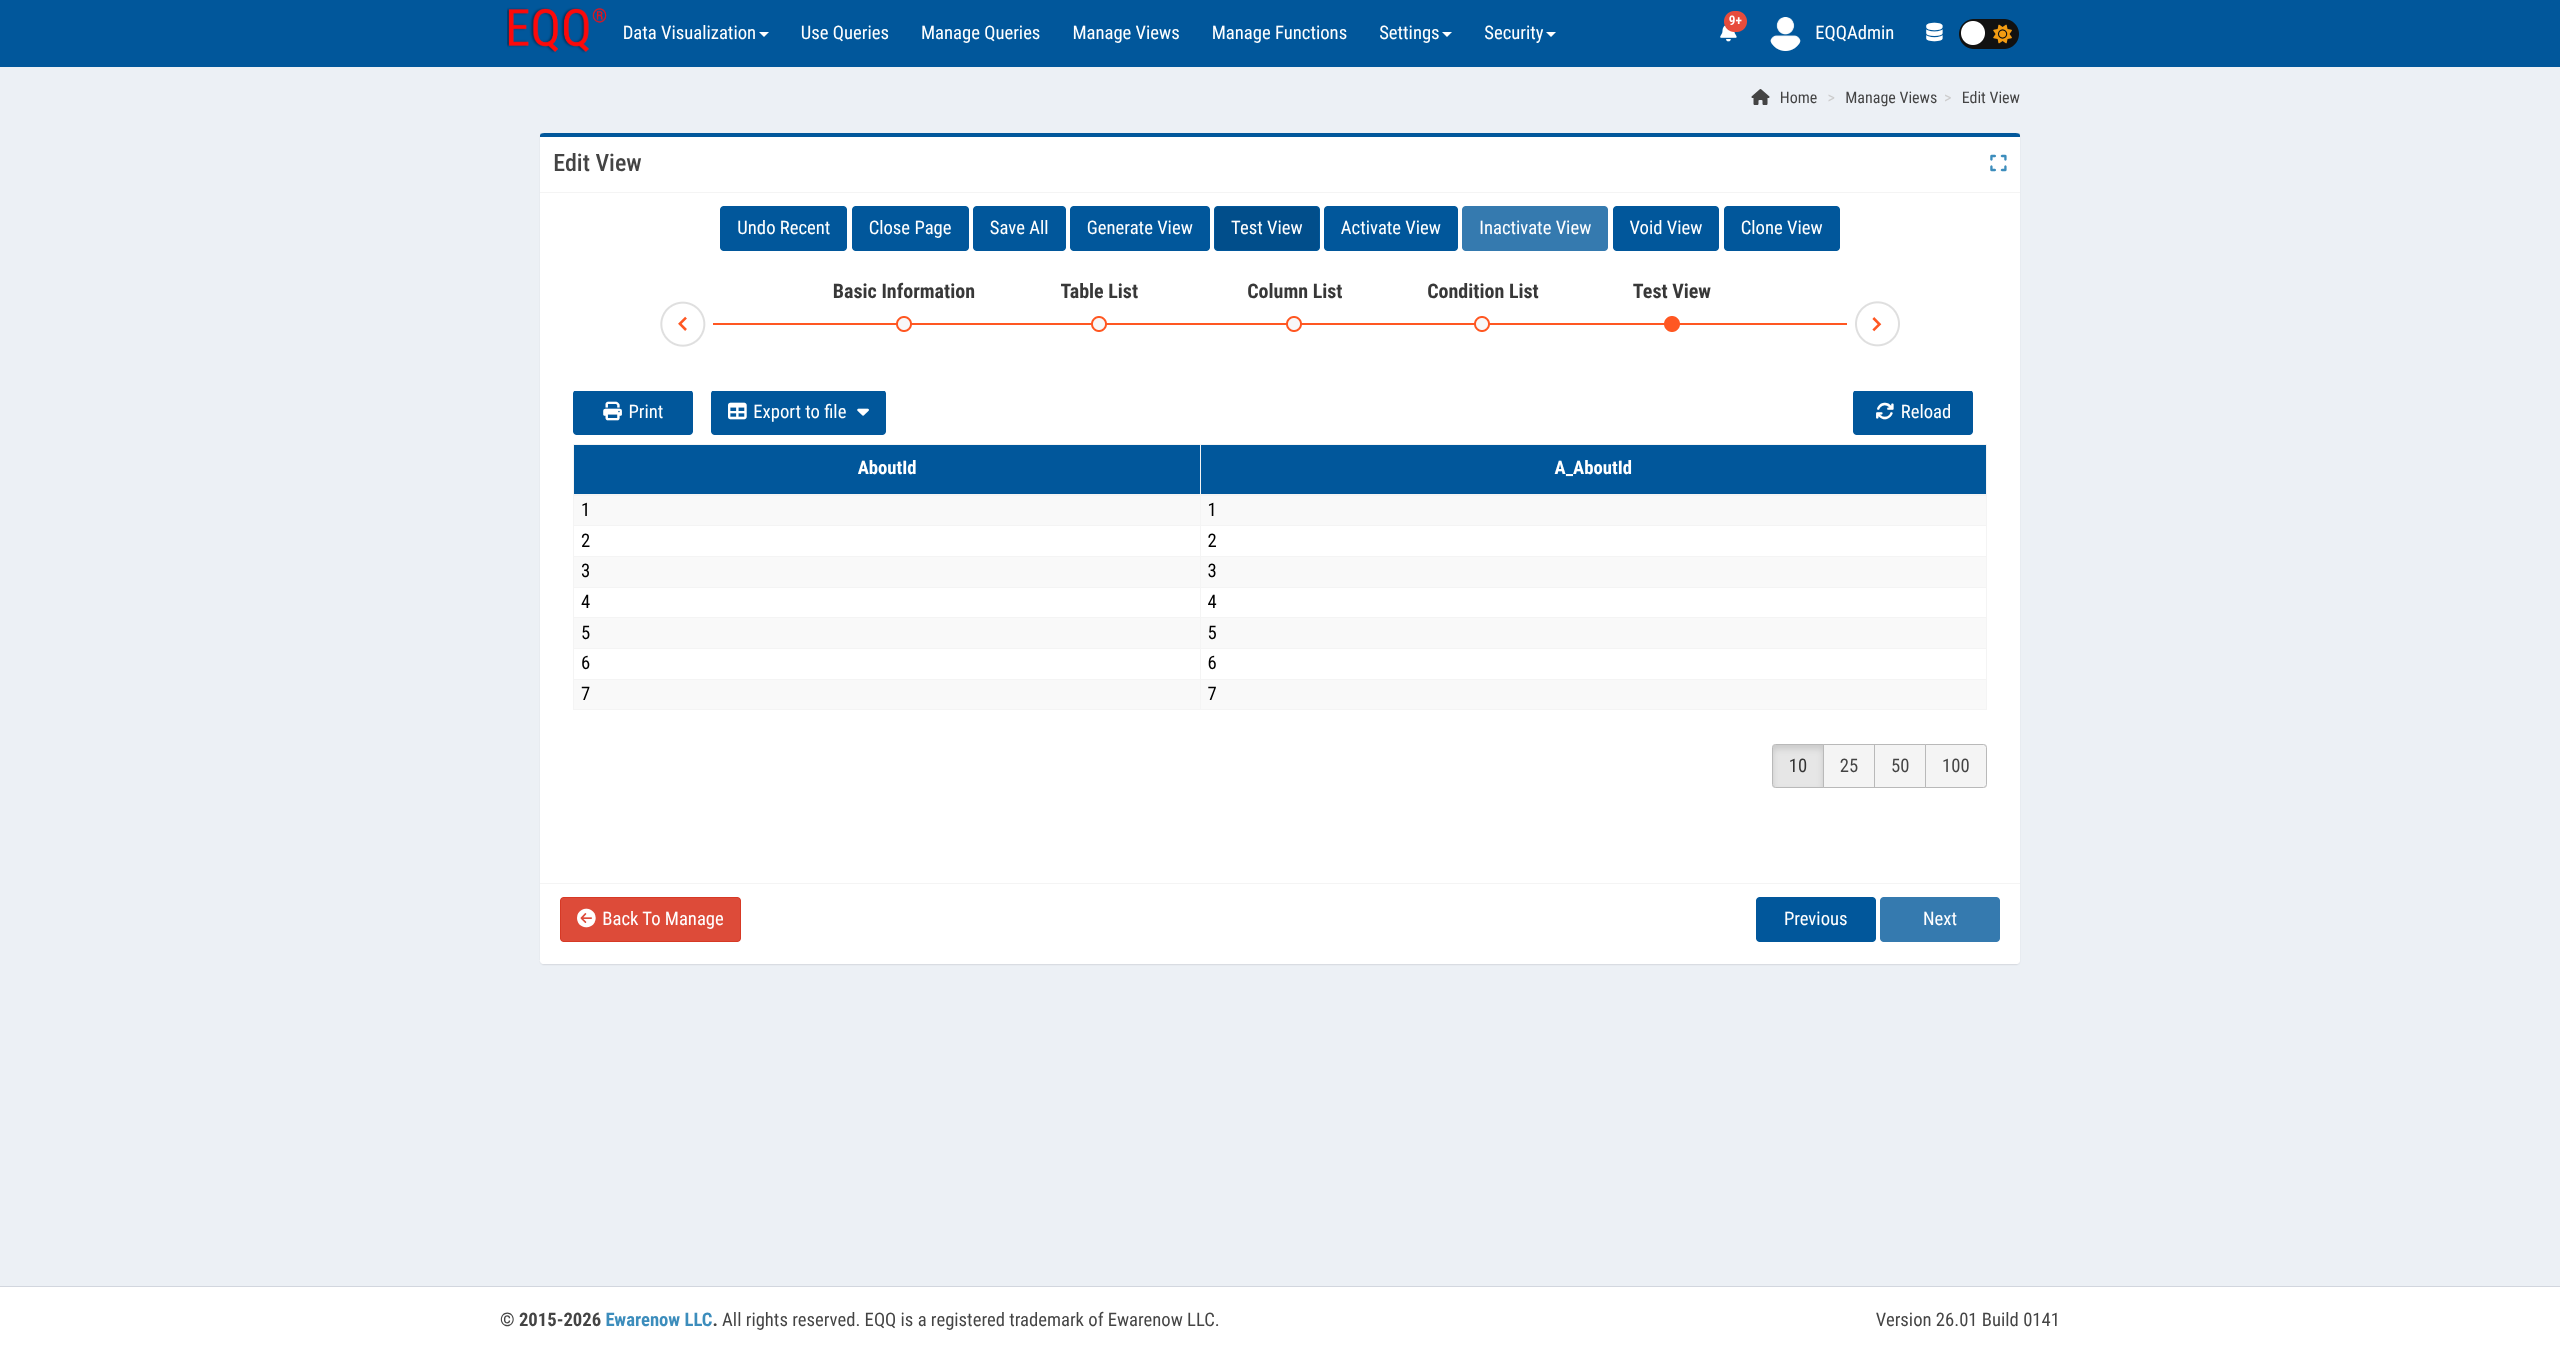
Click Reload to preview. If it looks right, use the top toolbar: Generate View, then Activate View. A View must be Active before any Query can use it.
Rule of thumb
One View per real-world thing - Customers, Orders, Items. Add joins here, not in the Query.
Step 3 - Build a Query
Navigate: Manage Queries → + Create. The editor opens on a 7-step wizard: Basic Information → Column List → Condition List → Parameter List → Sort By List → Epilogue → Test Query.
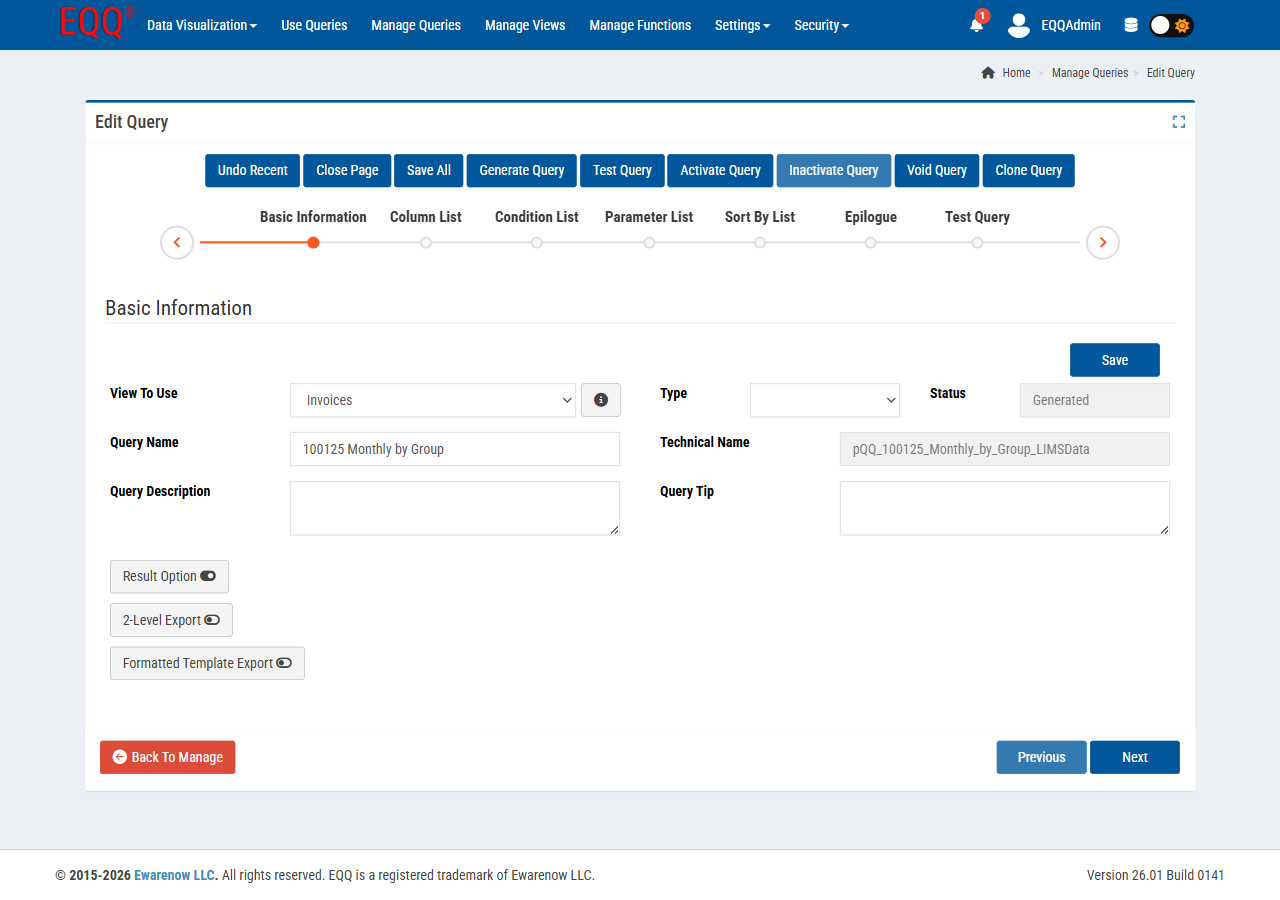
3a - Basic Information
| Field | What to enter |
|---|---|
| View To Use | The View you created in Step 2 |
| Query Name | e.g. Customer List |
| Query Type | Pick any, or leave the default |
| Query Description | e.g. Shows all active customers |
Click Save, then Next.
3b - Column List
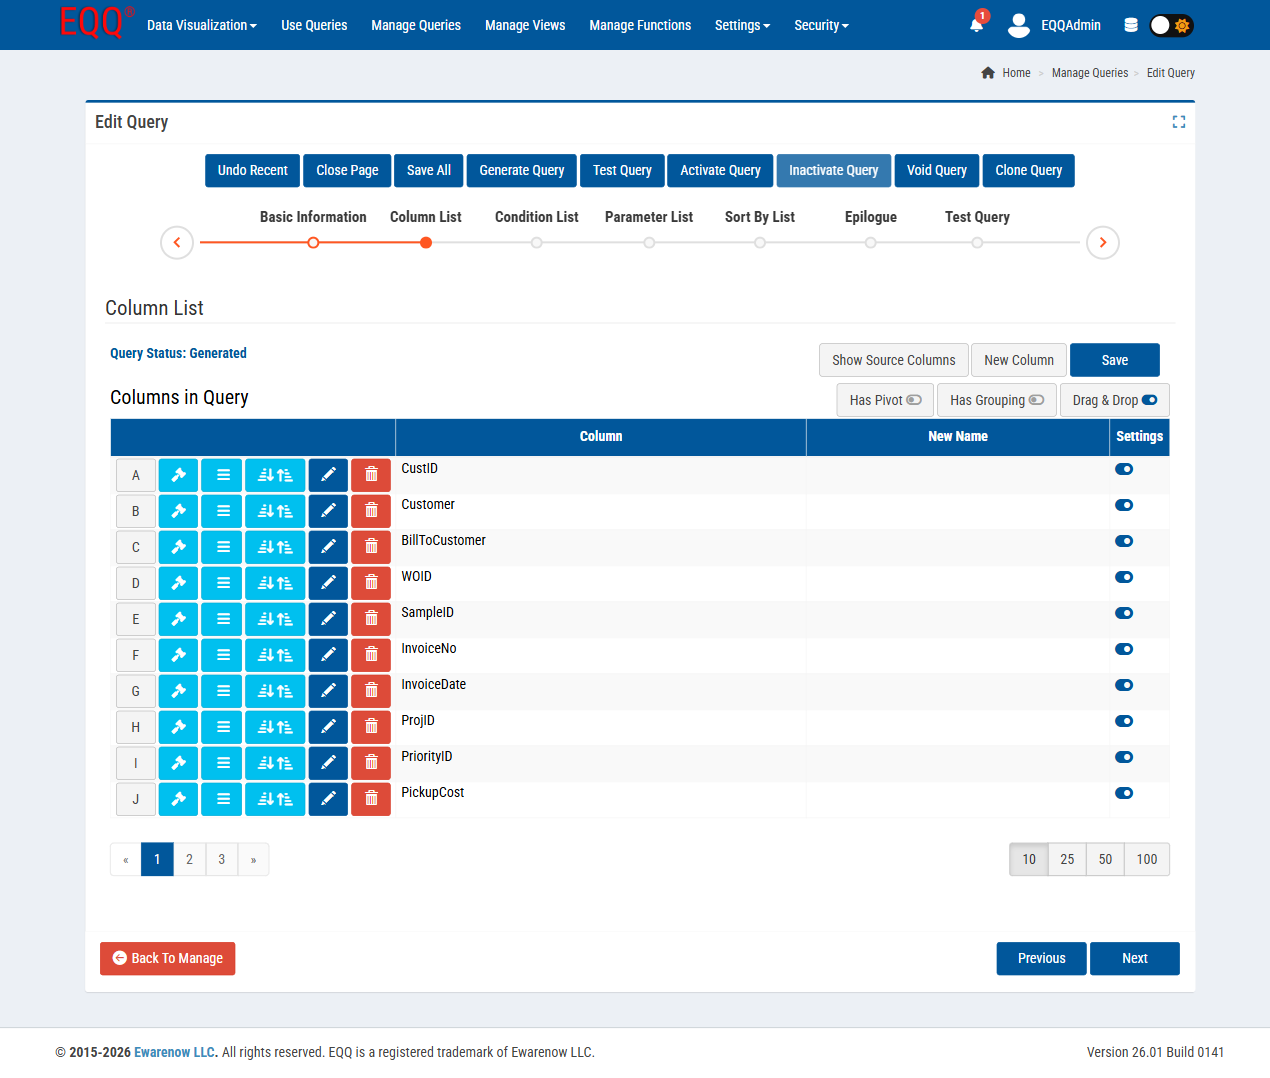
Check the columns to return; drag to reorder. Click Next, then Next again to skip Condition List for your first query.
3c - Parameter List (optional)
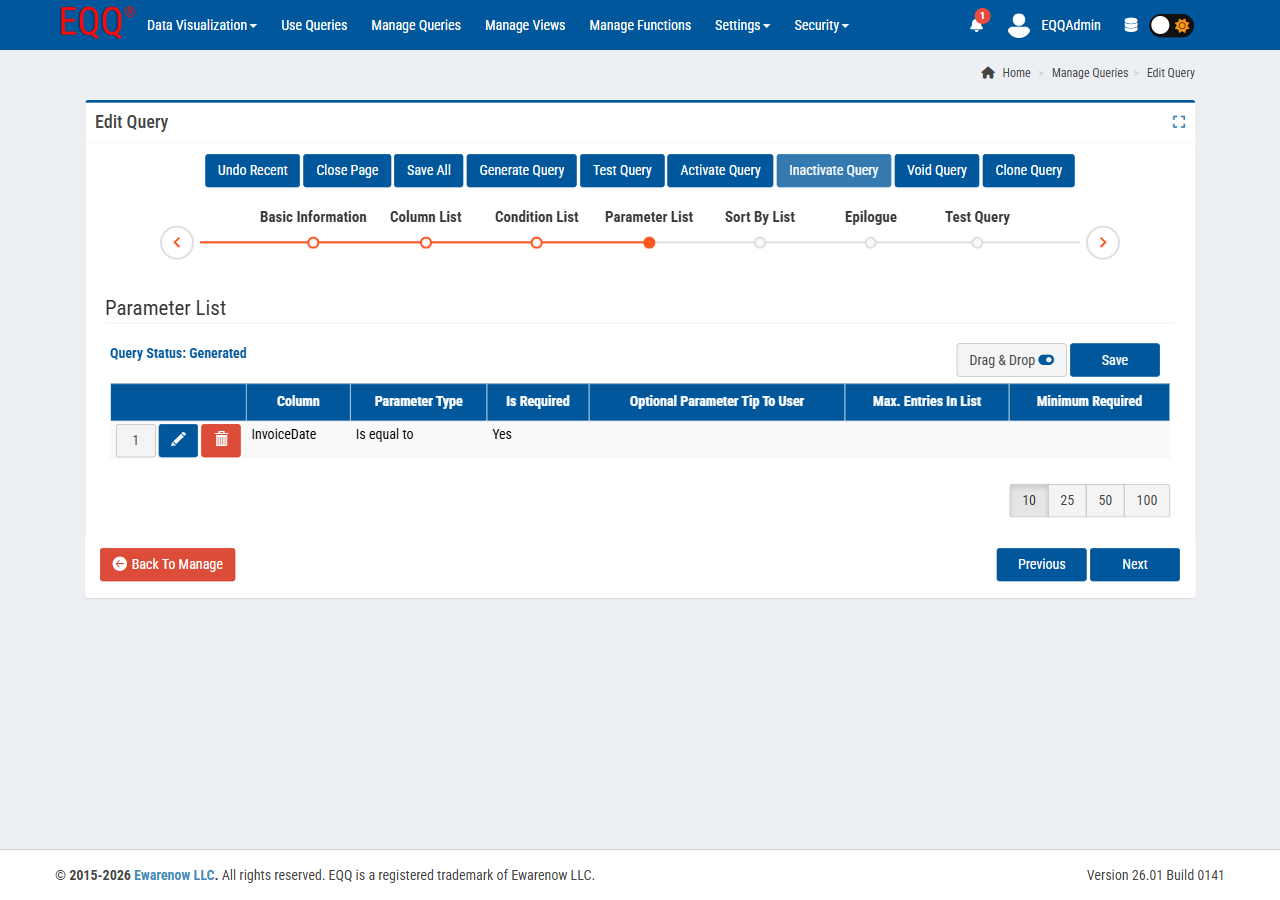
Parameters let whoever runs the query filter results at execution time. Skip this for your first query and click Next through to Step 7.
3d - Test and activate
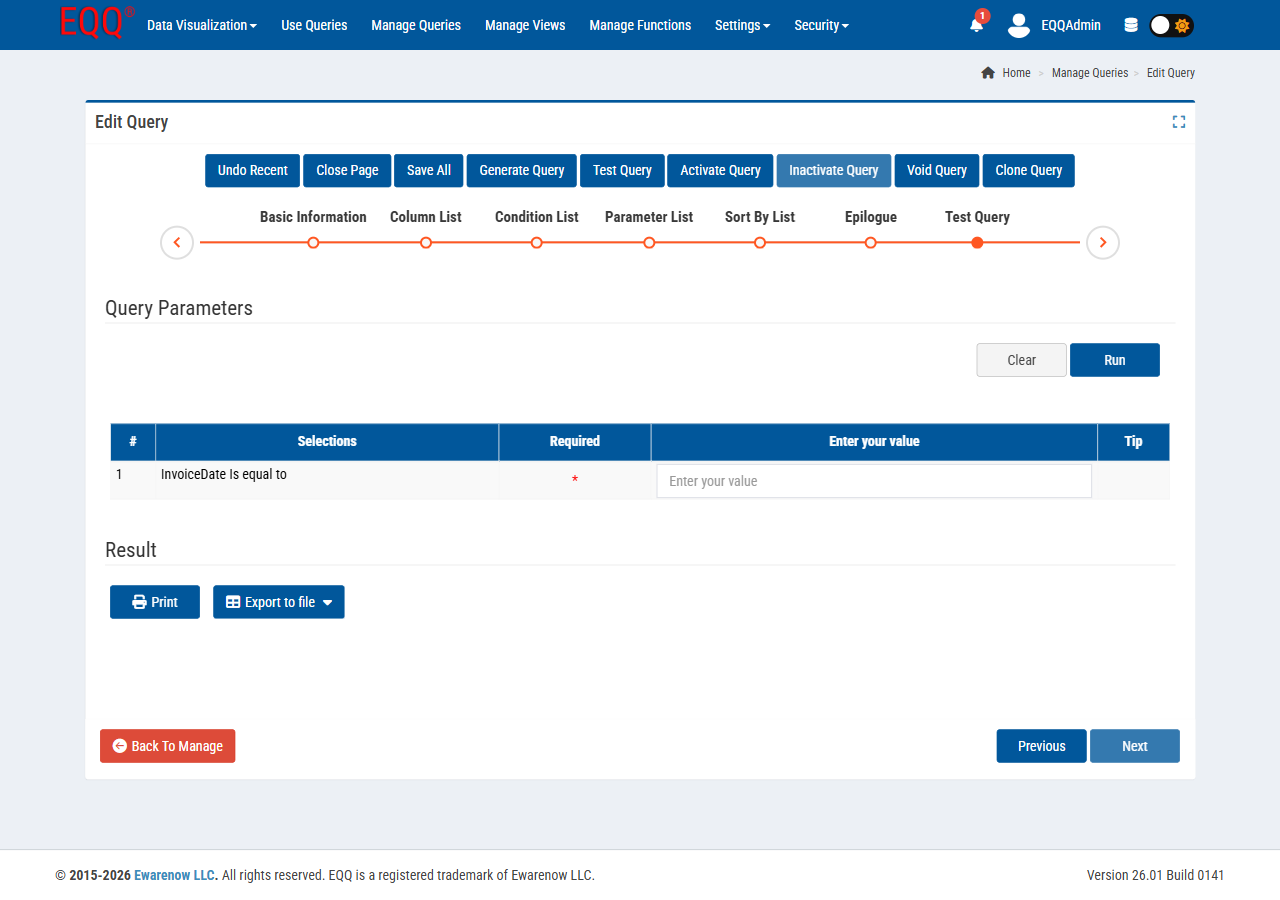
Click Test Query to preview, then use the top toolbar: Generate Query, then Activate Query. Your query is now live.
Step 4 - Run your query
Navigate: Use Queries, find your query, click the green ▶, fill any parameters, click Run.
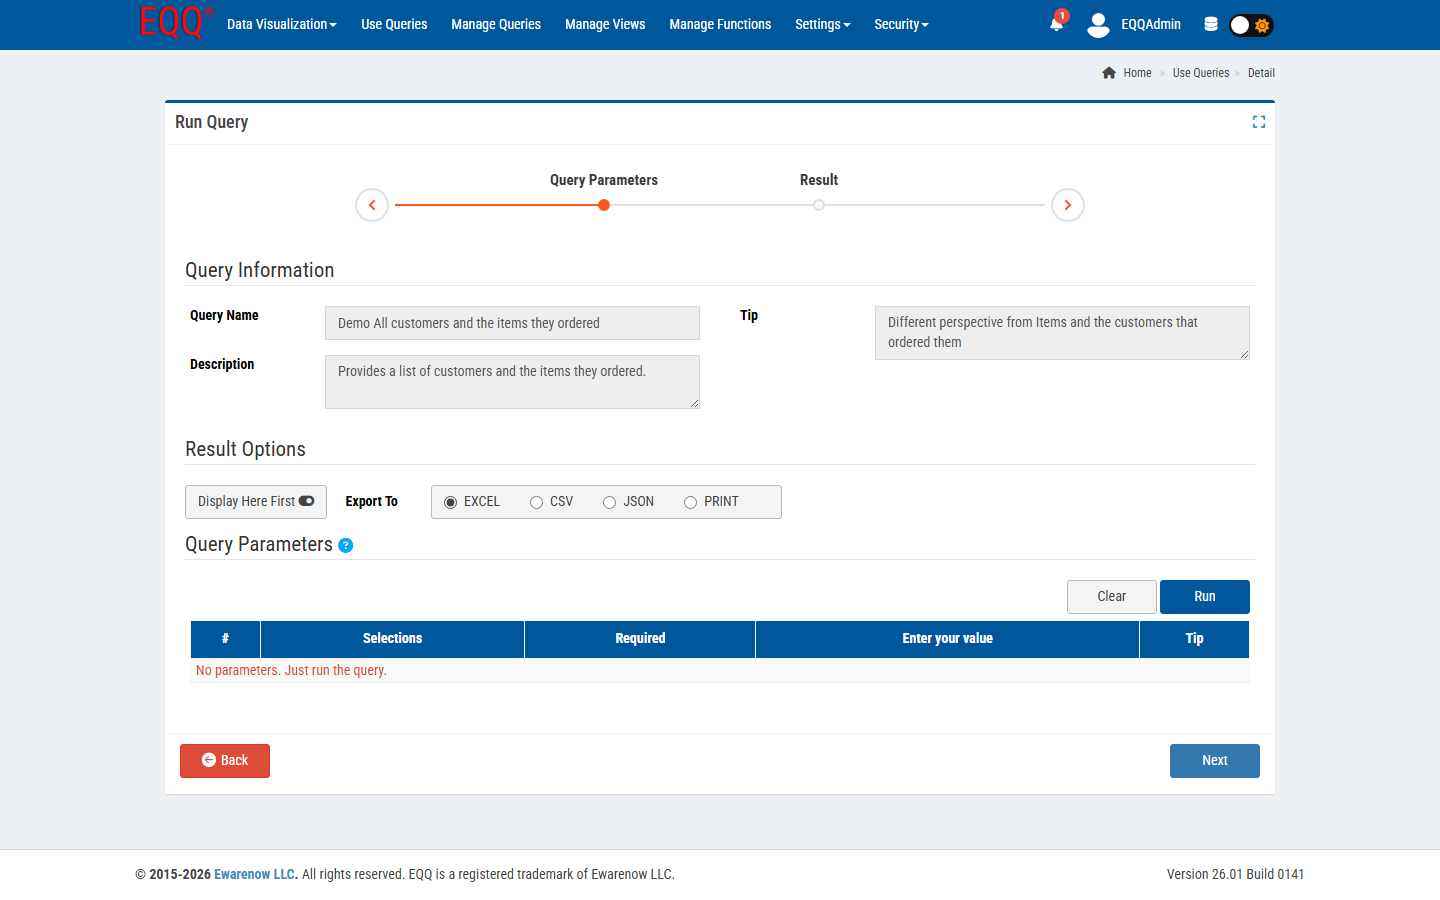
From the result grid you can sort, filter, and export to Excel, CSV, JSON, or Print.
You're done
Every query you build follows this same pattern.
What's next?
| I want to... | Go here |
|---|---|
| Understand every wizard field in depth (Has Pivot, 2-Level Export, Epilogue, and more) | Reference: Views and Queries |
| Publish this query as a REST API or a chart | Reference: Visualization & API Delivery |
| Add reusable calculations (tax, discount, formatting) | Reference: Functions |
| Add more users or set up MFA | Set Up EQQ |
| Connect an AI assistant to this data | Connect an AI Assistant |